Are you ready to add some extra sparkle and shine to your melt and pour creations? Whether you’re an experienced soap maker or just starting out, trying this crystal melt and pour soap recipe is a great way to elevate the look of your finished product.
It’s easier than it looks; all you need are the right ingredients and a bit of patience. Best of all, by following along with this step-by-step guide, you’ll be able to make gorgeous soaps that capture the beauty of crystals in no time!
Supplies Needed
As an Amazon Associate I earn from qualifying purchases.
- Pearl Mica
- Purple Mica
- 4 oz Clear Melt and pour soap base
- Grape Soda Fragrance oil
- Small Pain Brush
- Pink Silicone Molds
- Druzy Mold
- Skewer or Chopstick
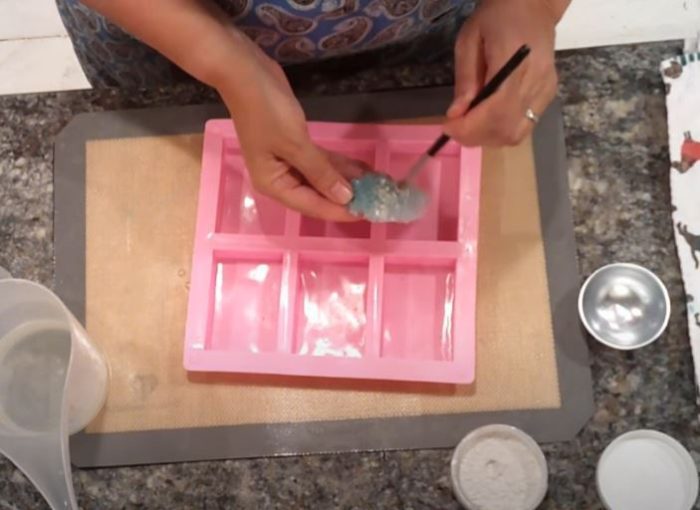
Paint the Druzy Mold
I purchased the mold from a shop on Etsy. This mold is easy to find on that website.
I grabbed the Pearl mica powder and paint brush and gently spread the dry mica powder on top of the mold.
Place the mold rough side up into your pink soap mold. It should stick nicely but I have a trick in case it does not later in article.
Melt the soap
Place about 3.5-4 ounces of clear glycerin soap base in the microwave. This will melt quick, so do short 10 second bursts to make sure you do not burn the melt and pour soap base.
Once you take it out of the microwave set aside the completely melted soap while you get your mold ready.
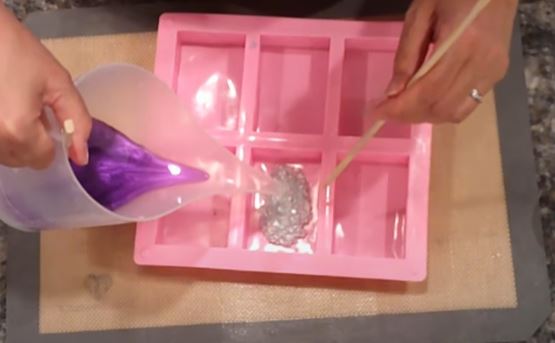
Pouring the melt and pour soap
I do not want to pour soap until the temperature is below 140 degrees as I really and not sure if pouring soap too hot will damage mold.
While the soap is cooling go ahead and add 1.5 mL of fragrance oil. I used Grape Soda for this homemade soap.
I also mixed a bit of purple mica powder in a small bath bomb mold with alcohol. I do this in a separate container to make sure the mica powder does not put small flakes of unmixed powder in melt and pour soap.
Use your thermometer to make sure soap base is below 140 degrees.
Once you have added the fragrance oils and mixed mica powder into the melt and pour soap base, check and make sure the mold does not move by holding it down after the pour. It is possible that the melt and pour soap could go under mold and float it up. Holding the mold down for just a few minutes will help to keep it in place.
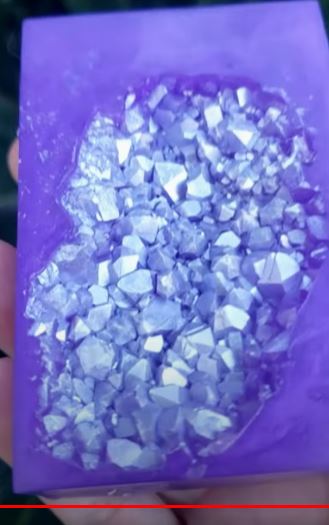
Unmolding the Melt and Pour Soap Design
When you are ready to unmold the soap. Take it out slowly and peel the soap that is above the mold away carefully. You should be able to grab the mold and carefully pull it away from the melt and pour soap easily.
You may need to clean up the soap around edges etc before wrapping.
Final Thoughts
So, there you have it – a guide to making beautiful melt and pour soap crystal designs! These soaps make lovely gifts or unique additions to any bathroom décor. They’re also fun to make and provide a great opportunity to get creative in the kitchen. What kind of melt and pour soap recipes do you like to do? Let me know below.