
Melt and Pour Soap Recipes
This is one of my first melt and pour soap designs when I started to make my own homemade soap.
Melt and Pour Soap is fun and easy to work with. It can be very forgiving, if you make a mistake, you can start all over again. One of the best features of melt and pour soap is that you can have your masterpiece ready for use in usually 24 – 48 hours.
Supplies Needed
- Melt and Pour Soap Base Opaque
- Clear Melt and Pour Soap Base
- Mica Power
- Pink 6 cavity soap mold
- Fondant Cutters
- Isopropyl Alcohol
- Pipettes
- Thermometer
I did make a video of this melt and pour soap several years ago. You will notice that at that time I used Lab Colors to add color to my melt and pour soap. I found mica powder to be a better choice as a colorant for several reasons.
First, I do not have to mix and have an expiration date written on the jar. The mica powders have a longer shelf life.
Second, once the lab colors are mixed, I would need to store them in the refrigerator. As you can guess this can become very cluttered and crowded extremely fast.
So, I use only higher quality mica powders that are made as they are used.
Now on to the recipe.
Step One:
Mix the mica powder in a little isopropyl alcohol. Using a pipette, pull up about 1.5 mL and place it in a container that you will only use for mixing your color (it may stain your container). Then add a small amount of mica powder. I would use a yellow for this design.
Step Two – Making the Embeds:
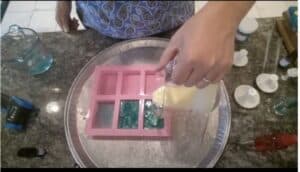
Each cavity of the 6-cavity mold holds about 4 to 4.5 ounces of soap base. Therefore, depending on how many embeds you are making, melt about 4 ounces of melt and pour base. Pour the melt and pour soap in to about three of the cavities. Only pour until you can no longer see the bottom of the mold.
Pour any excess into a free cavity, as you can save it and use it later. Wait about 20-30 min until the soap sets and gets hard.

Step Three – Cutting Embeds out:
Now that the melt and pour soap is hardened, you can unmold and flatten out on a flat surface. Grab a fondant or regular cookie cutter and cut out your designs. If you have too many, no worries you can save them and remelt them for later. Set aside.
Do not forget to save all your scraps as they can be remelted and reused.
Step Four:
Now that we have our embeds set aside, we can now concentrate on making the actual soap bars. In a microwave safe measuring cup melt approximately 4 to 8 ounces of clear melt and pour soap base. Do not melt it too hot as you do not want to burn your base. Only melt in 10 seconds spurts until the base is completely liquid.
Remember that each of the six cavities will hold approximately 4 ounces of soap and that we also have a little bit of opaque Milton pour soap leftover from making the embeds. We will reuse this soap that we had leftover to make our soap bars.
Once you have both melt and pour soap base is melted, we will set them aside and wait for them to cool we would like them to be at about 130 degrees Fahrenheit or lower without a skin if possible before we pour.
In the meantime, we are going to go ahead and mix our mica powder. I have chosen a green color that has a bit of a shimmer in it. Go ahead and put 1.5 mLs of isopropyl alcohol into a small cup, mix the mica powder in it separately once it is fully mixed add the green color to the clear melt and pour soap base stirring thoroughly. You should now have two colors of melt and pour soap base that you can mix together to make a bar of soap.
Step 5:
Grab your laser thermometer and measure the temperature of the soap bases. Ideally you would like them to be at 130 degrees Fahrenheit or lower. Take a separate pipette and pull up approximately 1.5 mL of your fragrance oil and distribute evenly into both bases.
Pour the clear melt and pour into 2 of the cavities of the six cavity silicone mold. Try to keep it as even as possible and then slowly pour your opaque melt and pour soap into the same cavities slowly. A funnel measuring cup works best for this process.
Take a skewer or a chop stick and gently swirl the two bases together. Then allow them to set and harden. This should take anywhere from 30 minutes 2.5 hours depending on where you live and the humidity etc.
Step 6:
When your bars are hard you can go ahead and unmold them. Now it is time to grab your embeds. Take any leftover melt and pour soap and melt in the microwave. If you do not have any leftover melt and pour soap you can always grab about one ounce of clear or opaque melt and pour soap base for this process.
Once you have a small amount of melt and pour soap melted you will want to grab your embeds and spray with isopropyl alcohol and gently spoon on a small amount of melt and pour soap and then flip it onto the bars so that it will adhere once the melt and pour soap dries. It will act like glue and the embeds will stick to the actual bar.
This is a very cute an easy melt and pour soap recipe that you can do even with your children to make your own homemade soap at home.
I do have a video of this process. Please click the link below and you could see our YouTube video making this soap step by step. You will notice that I do not use Lab Colors now as explained above. But, the rest of the steps should be easy to see in the video.
Happy Soaping
