
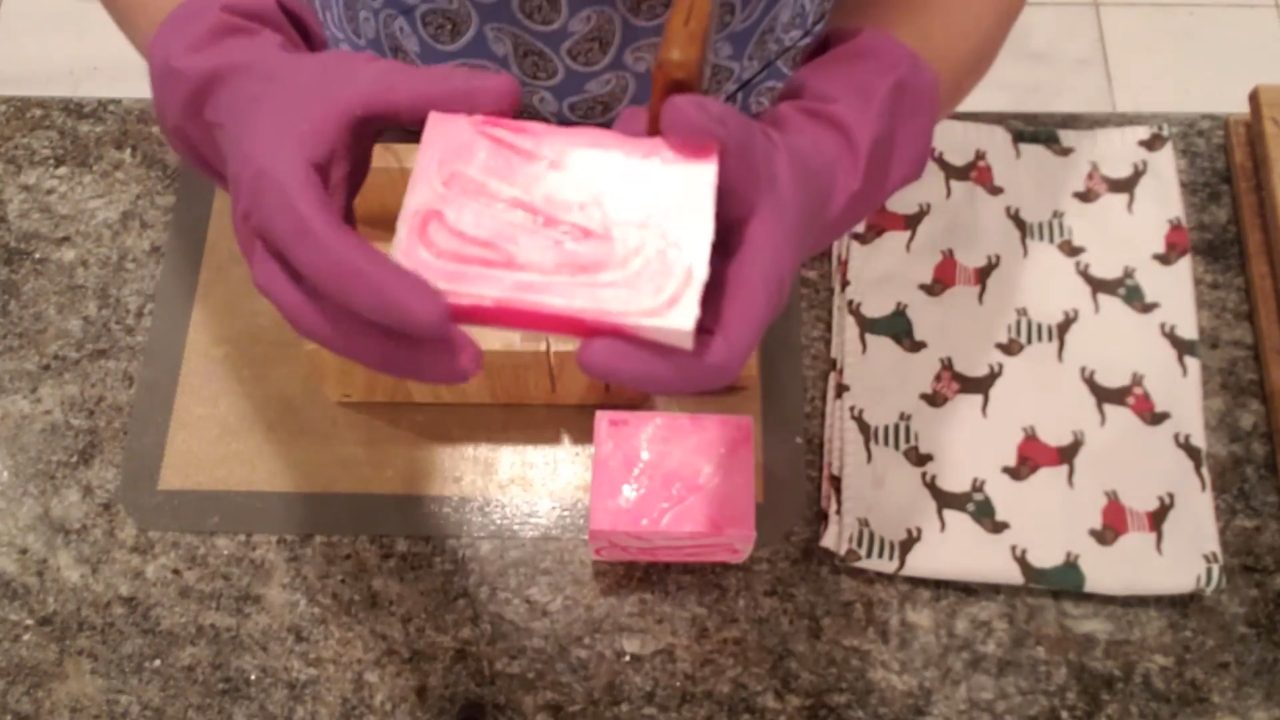
This candy stripe swirl melt and pour soap has bright neon pink, light pink and white stripes swirling through a square bar. I made it as a Valentine’s soap for kids to give to friends. It uses my layer-and-roll swirl method, but this time I cut the layers into strips and rolled them like a jelly roll to try for a sideways swirl.
As an Amazon Associate I earn from qualifying purchases. Some links in this post are affiliate links. They cost you nothing extra and help support Koala Soap.
Materials & Tools
Soap Bases
- Premium clear melt and pour soap base, about 4–5 oz
- Shea butter melt and pour soap base, about 4–5 oz for each layer, plus more for the final pour
- About 22 oz of melt and pour in total for an 18–20 oz mold
Color & Scent
- Poppin Pink (neon) from this Stardust mica set or individual Stardust micas
- A little white mica (or titanium dioxide) to make a lighter pink
- Black Cherry fragrance oil (try Barnhouse fragrance oils)
Tools
- Square 18–20 oz silicone soap mold
- Silicone cake pan for pouring the layers
- A Sharpie, a knife and a chopstick
- Wavy cutter or a soap cutter
- Spray bottle of 91% isopropyl alcohol
- Thermometer
Fragrance Amount
Use up to 5 ml of fragrance oil per 16 oz (1 lb) of soap base. For 22 oz of soap, that’s up to about 7 ml in total. You can always use less, but don’t go over 5 ml per 16 oz. Check your fragrance’s flash point before adding it to very hot soap. Mine was 200°F, so it was safe in the hot shea butter pour.
How to Make Candy Stripe Swirl Melt and Pour Soap
1. Mix the Neon Pink
Melt the clear base and one cup of shea butter base, and keep a second cup of shea butter white. Mix Poppin Pink with alcohol and stir it into the clear base for a hot pink, and into the shea butter for a second pink. If the two pinks look too similar, mix a little white mica into the shea butter pink to lighten it. Add your fragrance.
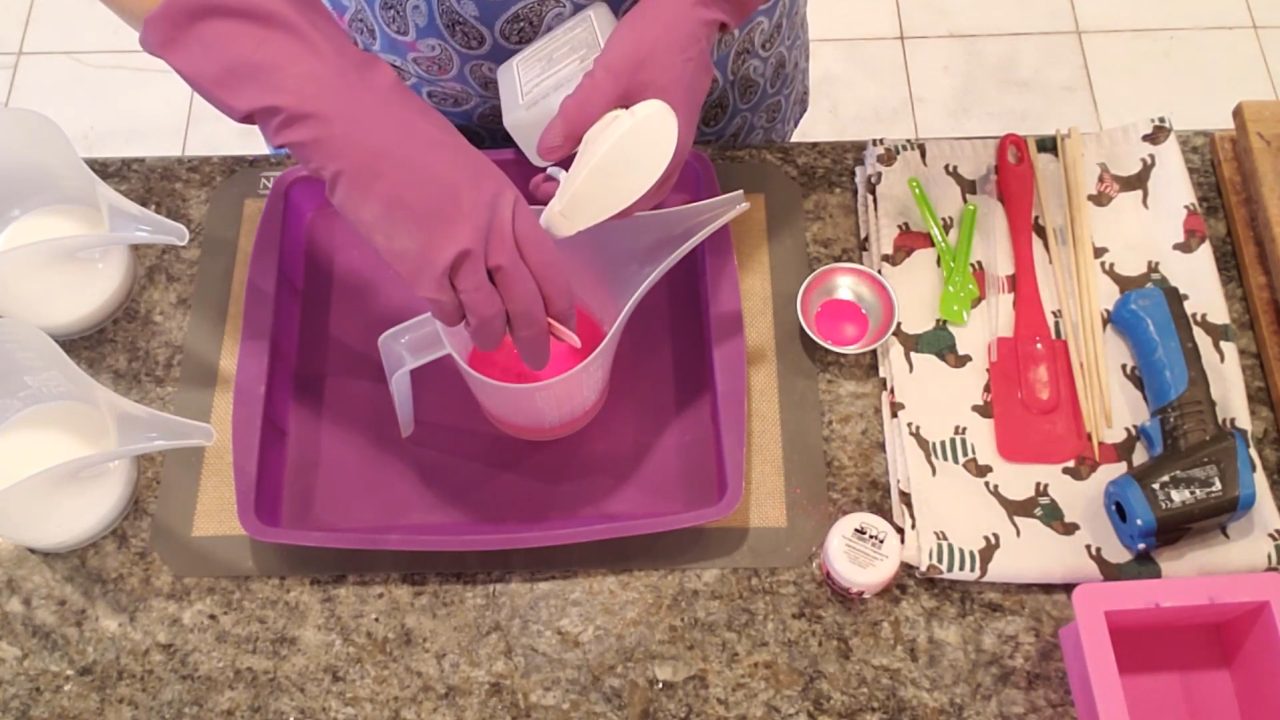
2. Pour the Clear Pink Layer First
Clear (glycerin) base sets faster than shea butter, so pour it first. Pour it into a silicone cake pan, which is flexible enough to mold around a little. Spray with alcohol and let it set.
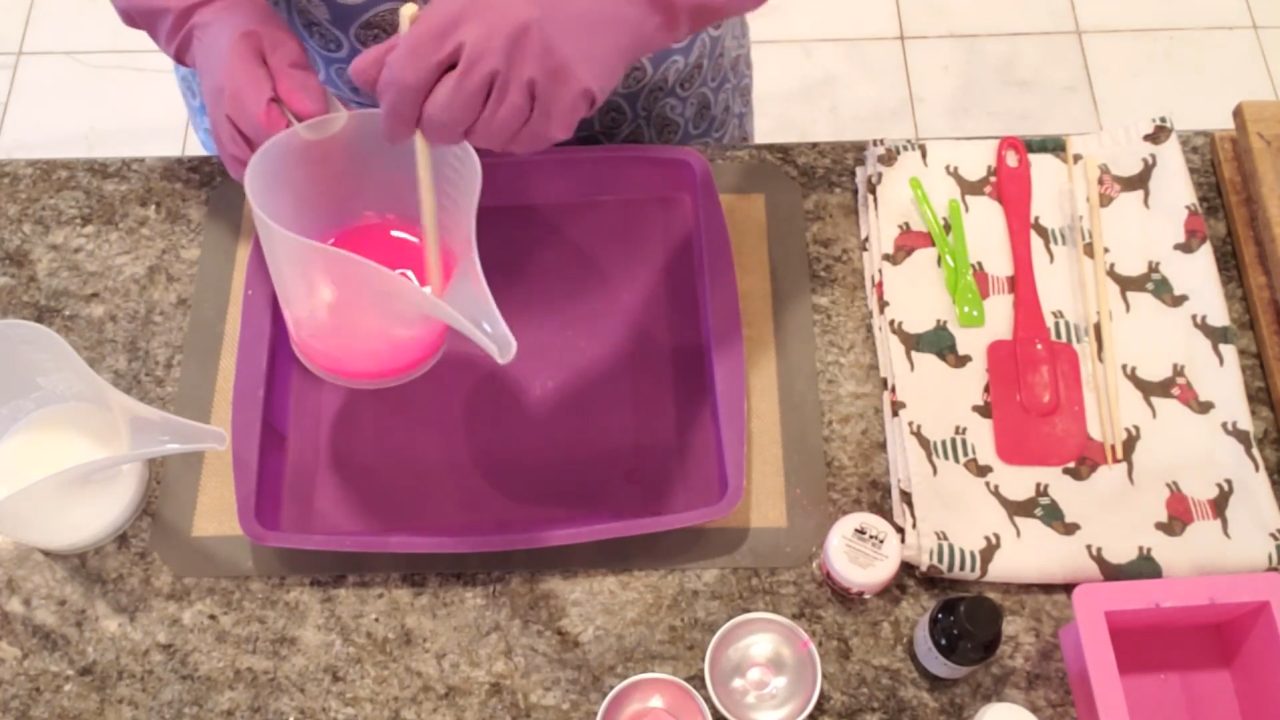
3. Add the White Layer
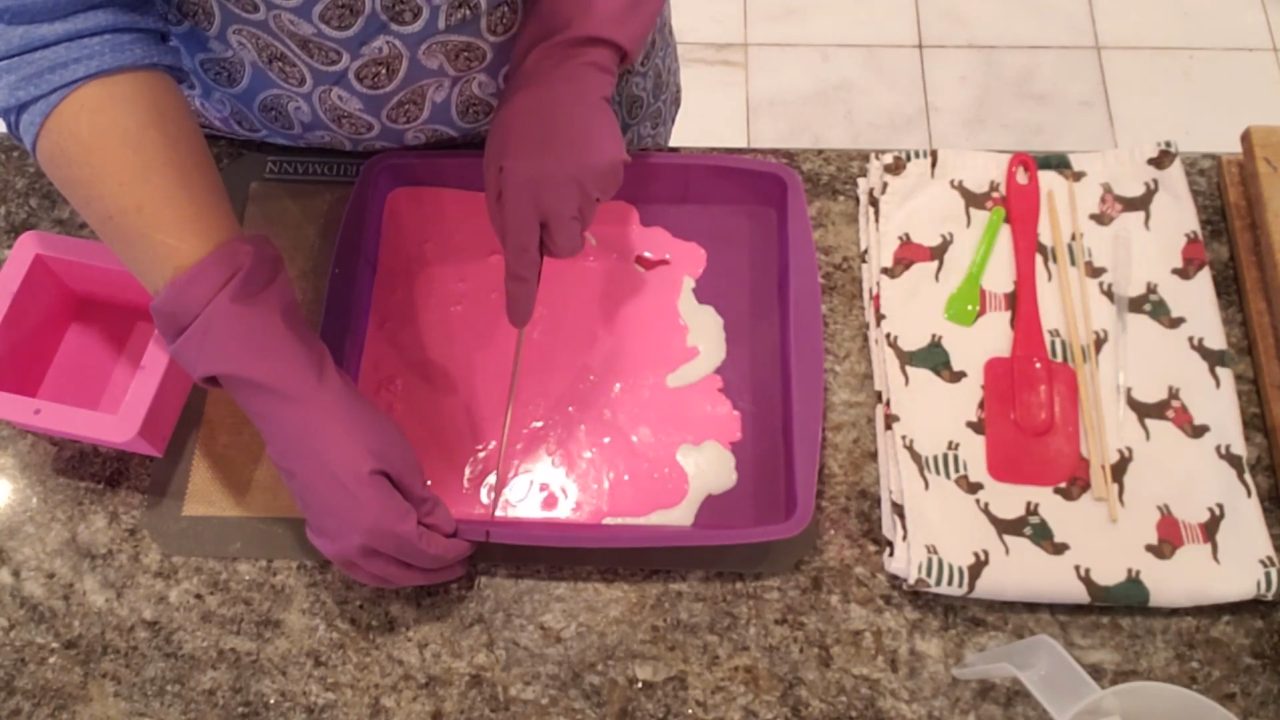
Score the pink layer with a skewer if you like, and spray it with alcohol. At about 123°F, pour the white shea butter slowly, starting at the edges where the soap is firmer. A little mixing is fine, since it all gets rolled up anyway.
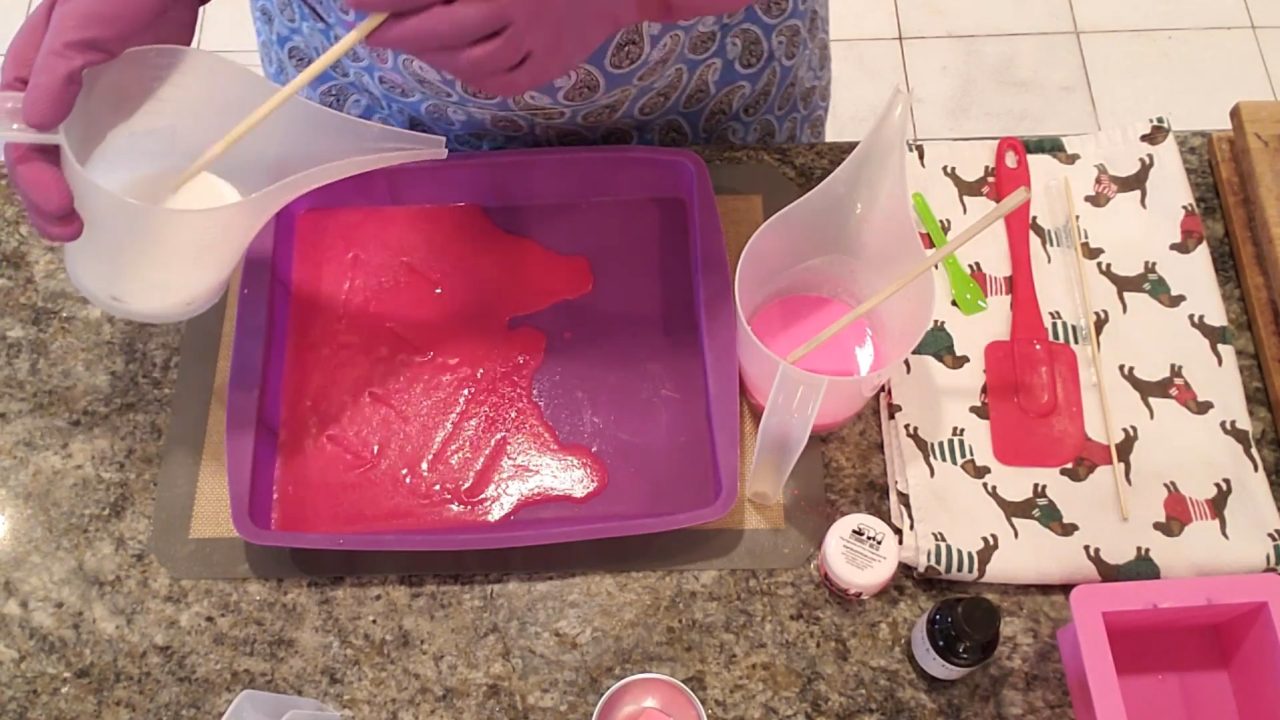
4. Pour the Light Pink Layer
When the white has a skin (mine was about 99°F), spray it with alcohol and pour the light pink very slowly and close to the surface, so it doesn’t break through. Skin that’s already pink is fine to leave in.
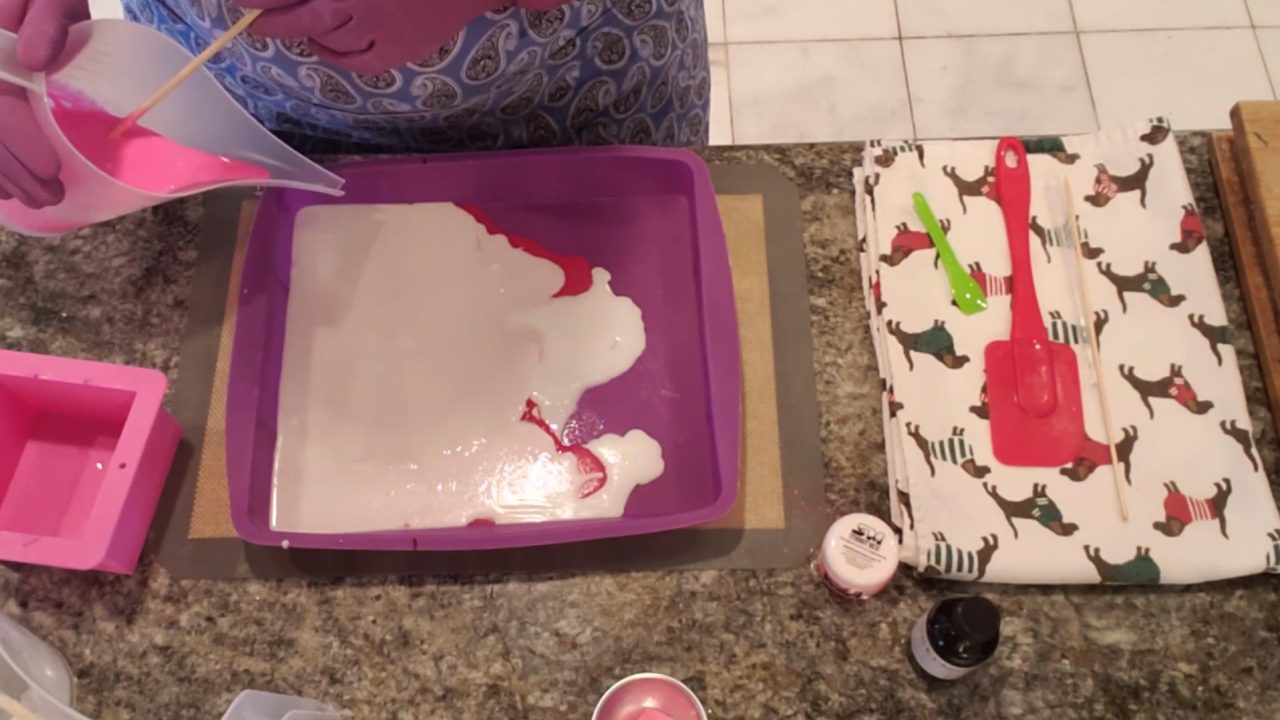
5. Cut and Roll the Layers
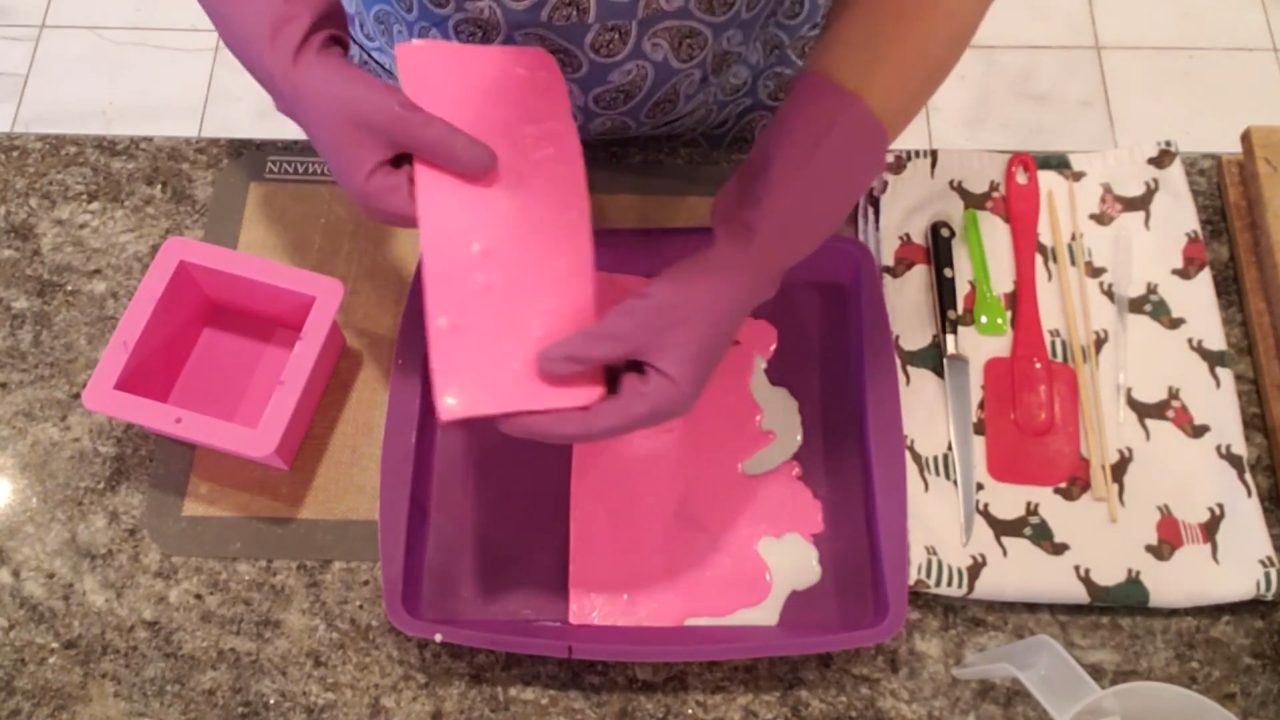
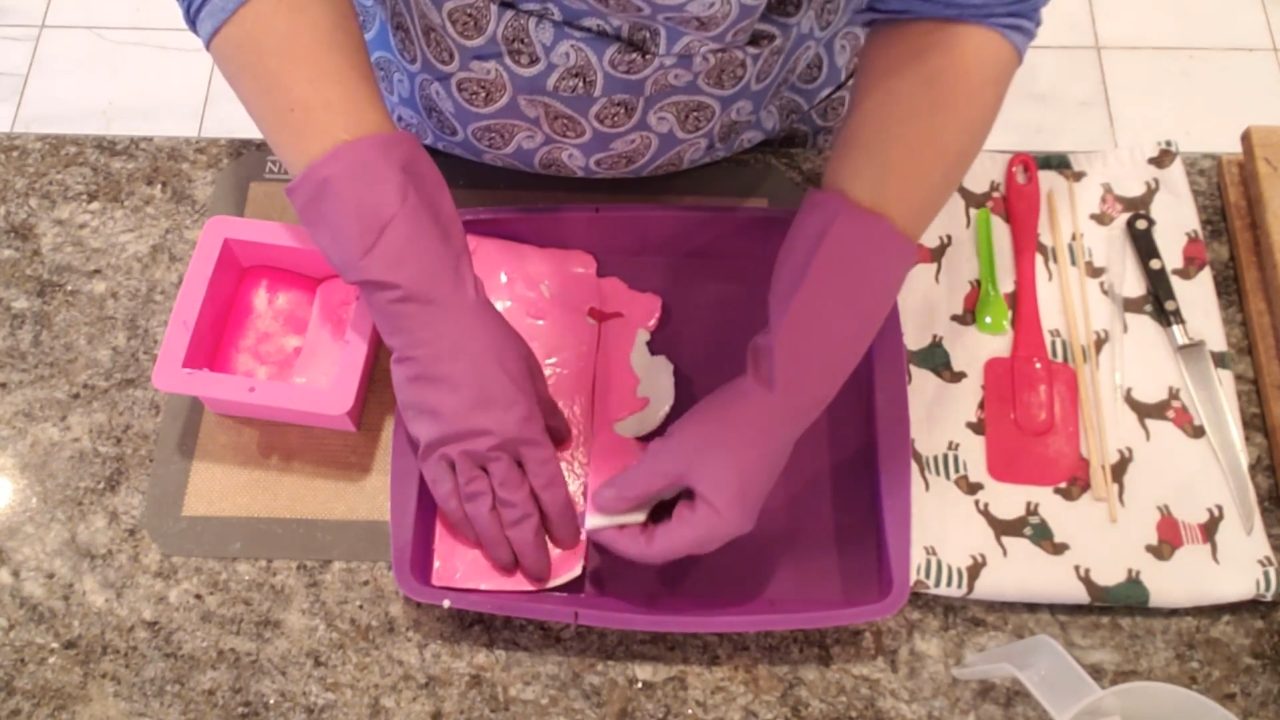
Mark the width of your mold on the cake pan with a Sharpie. Once the layers are set but still a little soft, cut straight down between the marks. Roll each strip up like a jelly roll and stand it in the mold so you can see all three layers from the front. Repeat with the remaining strips and tuck the last little piece in the middle.
6. Poke Holes
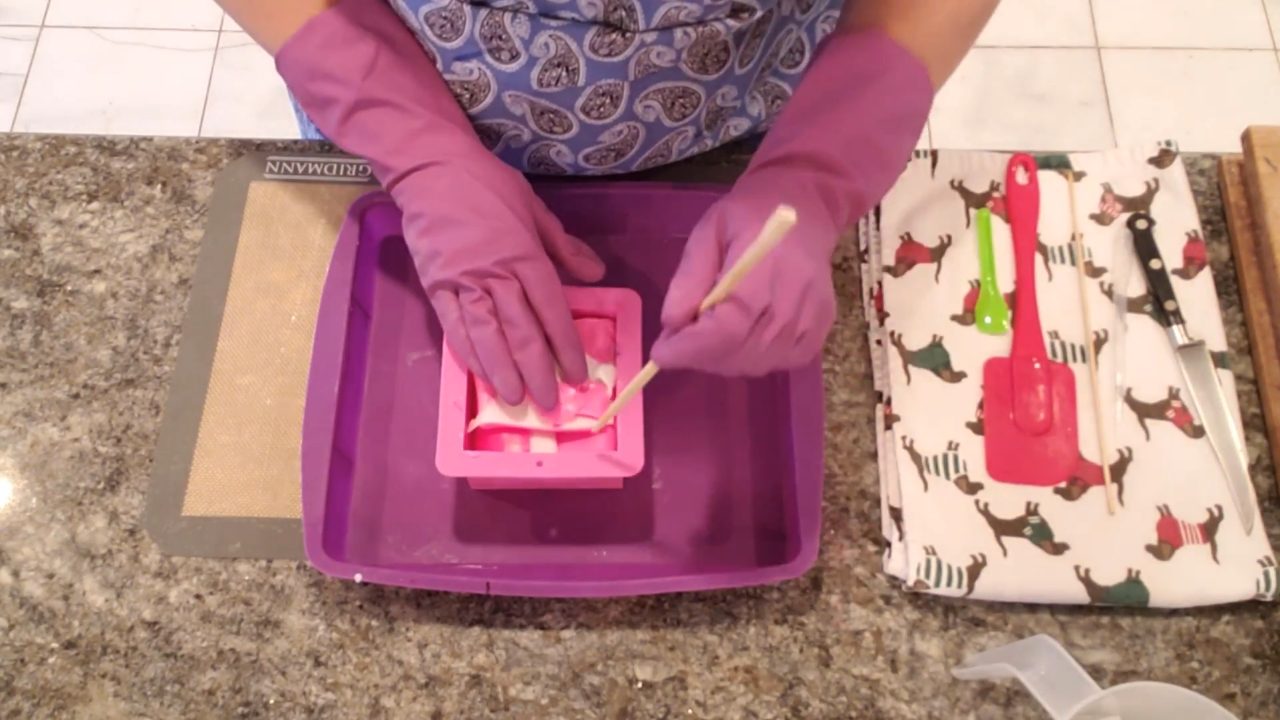
Poke holes between the rolls with a chopstick. Put them where you’ll cut the bars, so the holes don’t show. Make sure the mold keeps its square shape.
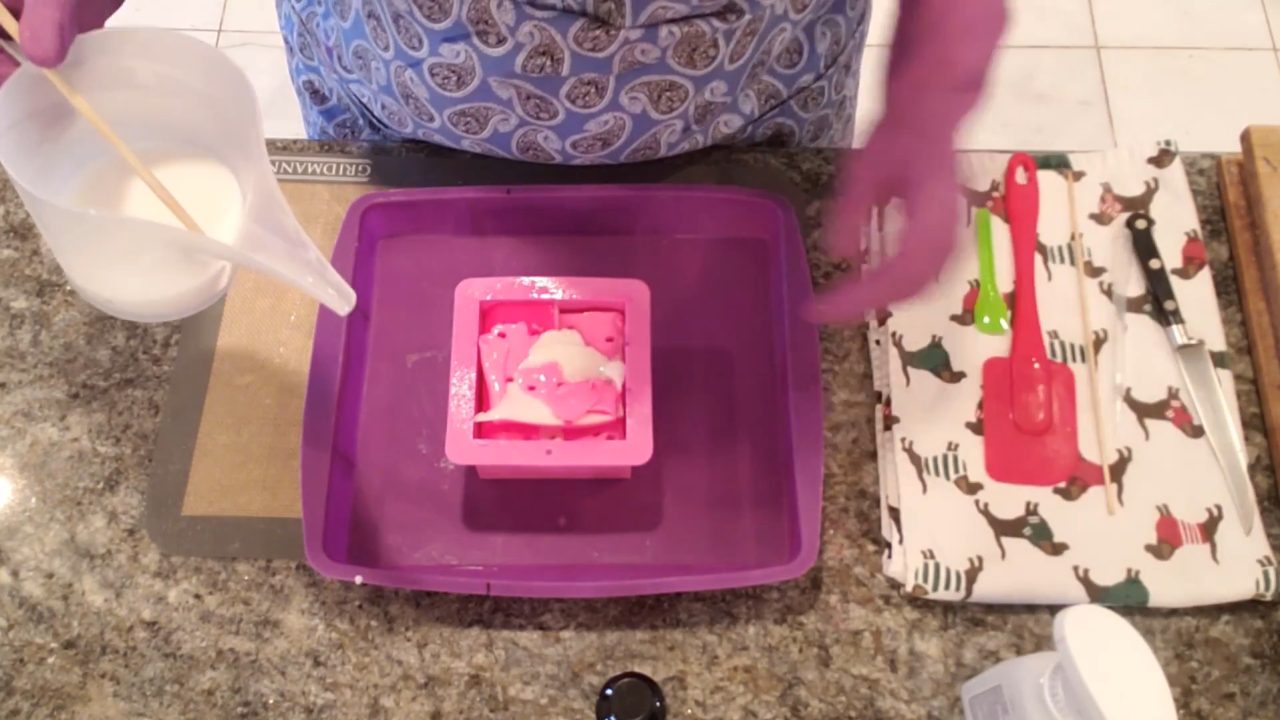
7. Pour Hot Shea Butter
Heat the remaining shea butter to around 170–190°F and add a little fragrance if its flash point allows. Spray with alcohol and pour into the holes. Melt about another ounce if you need it to cover the top. Squeeze the mold gently to release air bubbles, and keep checking and spraying bubbles with alcohol as it starts to set.
8. Unmold and Cut
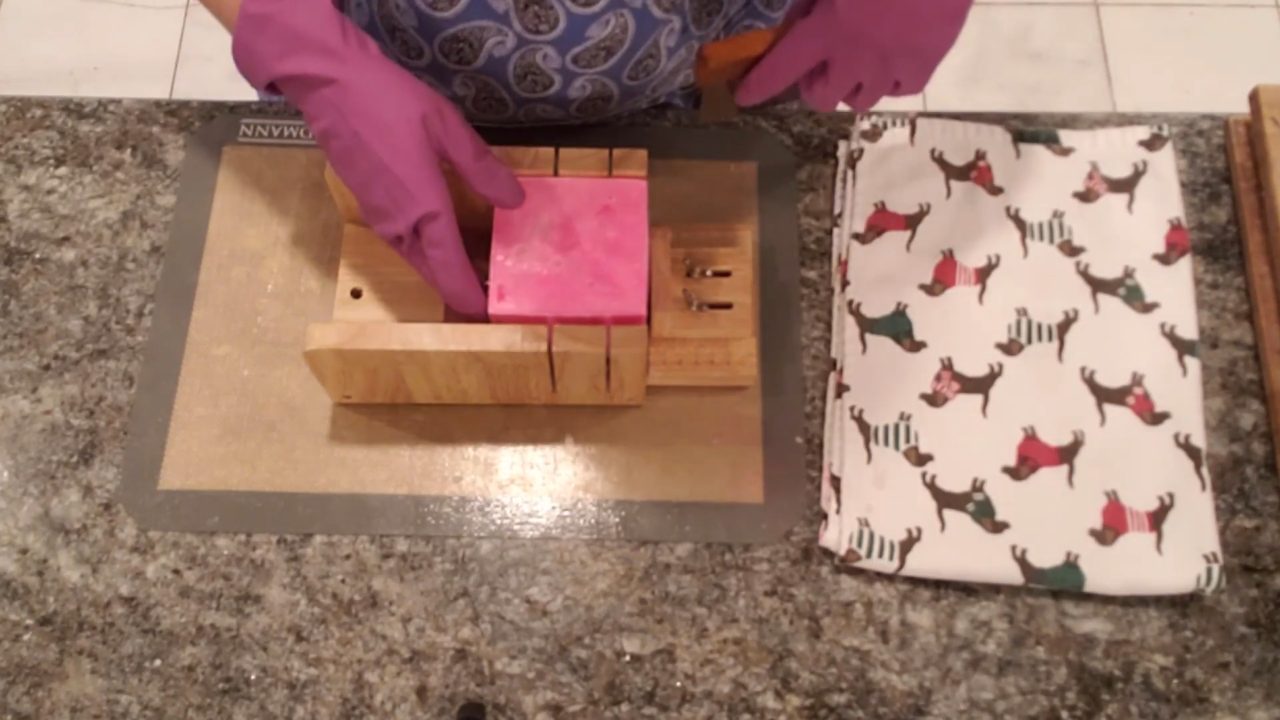
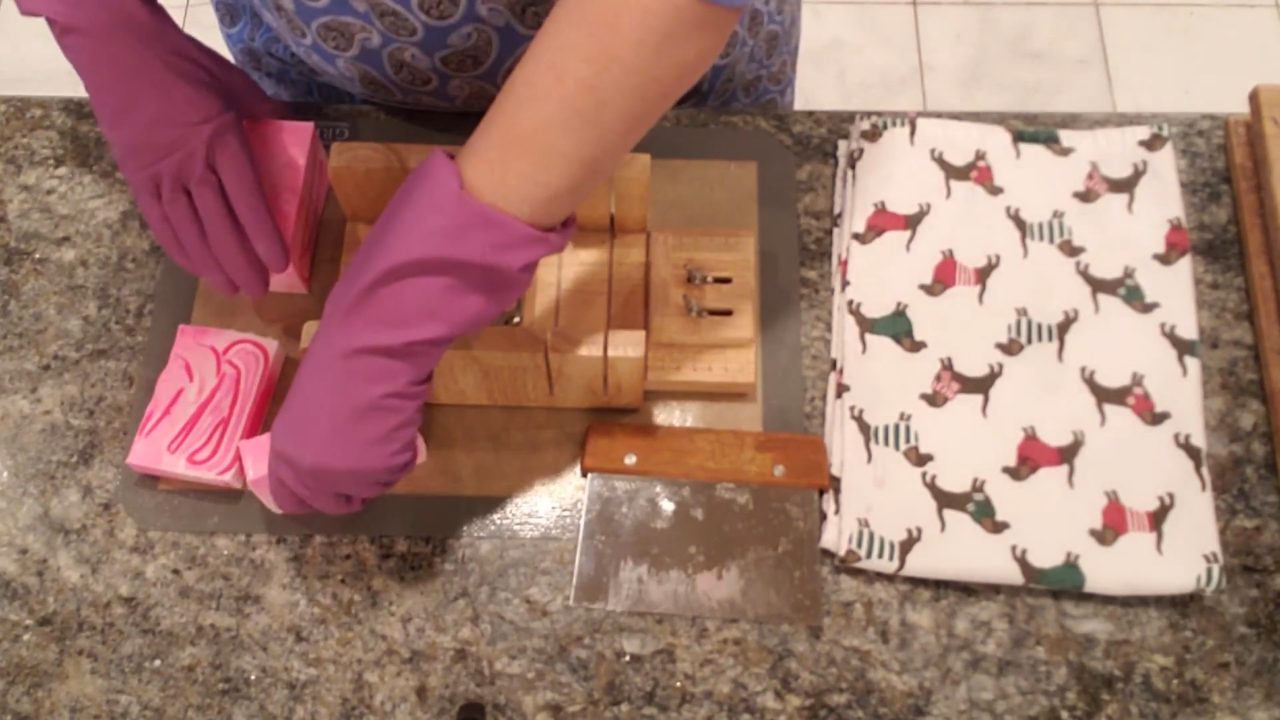
Unmold the loaf, keeping track of which side is the front, and cut your bars. With a cutter, hold the soap up and to one side before you cut. Roll the bar off the cutter in case it’s still a little soft.
Tips & What I Learned
- Neon micas stay bright. They’re great for kids’ soaps and bath bombs.
- Make your colors distinct. Lighten one pink with white mica so the layers show.
- Pour clear first. It sets faster than shea butter.
- Pour the layers slowly and close. That keeps them from breaking through.
- Hide the holes. Poke them where your cut lines will be.
- Rolling vs. balling: the jelly roll gave an interesting stripe, but the ball method gives a curvier swirl.
Troubleshooting
The colors look the same.
Add a little white mica to one of the pinks.
The top layer broke through.
Wait for a thicker skin, and pour slowly and close to the surface.
Air bubbles keep rising.
Spray them with alcohol while the soap is still liquid, or pop them with a skewer.
FAQ
How much fragrance oil should I use?
Up to 5 ml per 16 oz of soap base. You can always use less, but don’t use more than 5 ml per 16 oz.
What’s the difference between this and a regular swirl?
The layers are rolled, not stirred, so the colors stay crisp and separate.
Can I tone down the neon?
Yes. Mix in white mica or titanium dioxide for a softer pastel.
More Swirl Soap Ideas
- Lavender Swirl Melt and Pour Soap
- Irish Swirl Melt and Pour Soap
- Heart Embed Melt and Pour Soap
- How to Swirl Melt and Pour Soap
- All my melt and pour soap tutorials on YouTube
If you make this, I’d love to see it! Tag me on Instagram or Pinterest, and subscribe on YouTube for new soap tutorials.
