
Making of Summer Love Melt and Pour Soap
I was excited to make this Summer Love melt and pour soap for several reasons. The first reason is that I would be able to use my salad shooter that I purchased used or refurbished off of Amazon. I absolutely love how fast it shreds the soap for decoration. Confetti soaps will now be such a breeze.
It came with two different blades that would allow me to make smaller slices for confetti soaps and larger slices for different types of embeds. To clean these blades, just wash with warm soap and water.
Grab your Soap Colorant
To start with this design, we need to decide on the colors that we are going to use. I saw a painting downtown that had certain colors that I thought would look kind of look good together in a soap. So I went ahead and found those micas that were as close to those same colors in my collection and went to work.
you will need your pink rectangular mold that has six cavities for this. I went ahead and grabbed three funnel cups two of the final cups had 7 ounces of shea melt and pour soap base. The third funnel cup had approximately 9 ounces of shea butter melt and pour soap base.
I used an orange and a blue mica powder for this design. Remember to mix your mica powder in alcohol prior to pouring it into your melted soap base. If you do not you might get a speckled effect on the bottom of your soap when it settles.
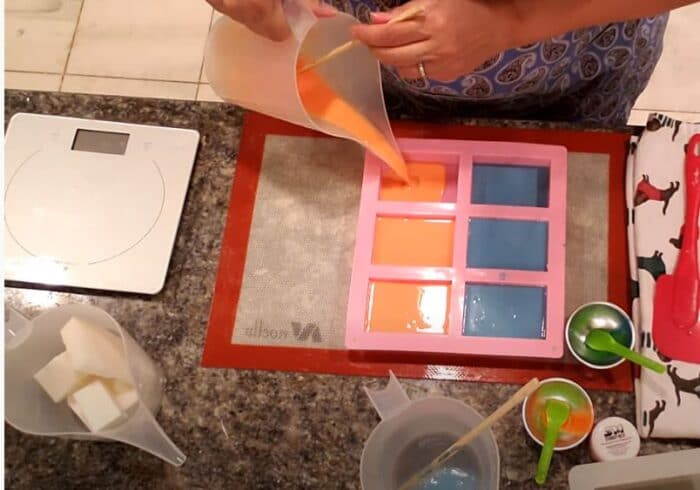
I went ahead and melted the two 7 ounces of shea butter melt and pour bases. Then I added the mica and the fragrance oil.
Since this design used more than a pound of soap I went ahead and added about 7 mLs of fragrance oil. I then poured them into our pink rectangular mold and allowed them to set. This took about an hour.
Using the Salad Shooter
I then went ahead and grabbed my salad shooter and placed the larger slicing blade into it. I cut my soap embeds in half so that they would fit into the opening of the salad shooter. And then made my embeds. This was quick and I loved it.
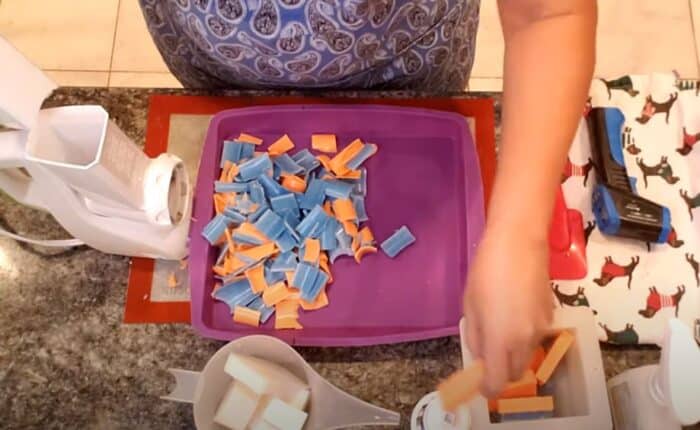
I set the embeds aside and then grabbed 9 ounces of my shea butter melt and pour soap base and melted it. Once melted, I allowed it to cool to approximately 130 to 140 degrees Fahrenheit. At this time, I mixed in the final amount of fragrance oil.
Grab your square mold that holds approximately 20 to 22 ounces and place your embeds into the mold. Once they are in the mold in the mold is full of embeds, go ahead and pour your shea butter melt and pour soap on top of it. Remember to tap the mold on the counter so that you can send any air bubbles up to be popped once they float to the top of the mold.
You can spray the air bubbles with alcohol or if the skin is becoming too thick you can pop them with a skewer or any other instrument with a pointed edge on it.
I always seem to have more embeds than I need for these types of soaps and not enough of the opaque melt and pour base to pour on top of them . Not a problem, just save your embeds for another design later an melt a little bit more melt and pour opaque for the mold.
Time for the cut
Once the soap has cooled go ahead and cut it with a so cutter. I like to use the wavy blade on these types of soaps because it adds to the depth onto the design.
Wrap the soap in shrink wrap or Saran wrap once cooled to prevent sweating.
Here is a link to the video on how to make the soap.

1 thought on “Summer Love Melt and Pour Soap”