
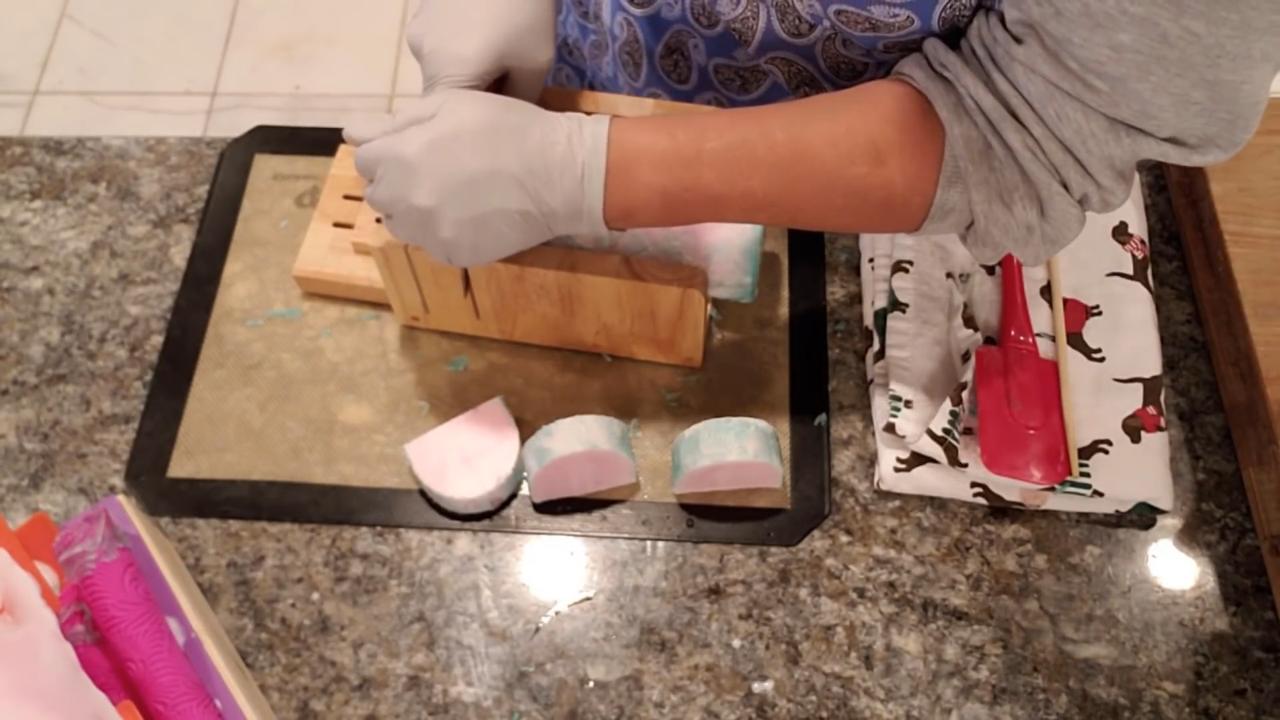
I couldn’t find the curved soap mold I wanted, so I made my own with plastic taco holders, a loaf mold and a silicone impression mat. The curved top picks up a delicate colored pattern from the mat. The swirl I tried inside didn’t turn out how I hoped, but the DIY curved mold worked great, and I learned that less is more.
As an Amazon Associate I earn from qualifying purchases. Some links in this post are affiliate links. They cost you nothing extra and help support Koala Soap.
Materials & Tools
Soap Base
- About 5 cups of shea butter melt and pour soap base for the loaf
- About 1 cup of clear melt and pour soap base for the impression mat layer
Color & Scent
- A green or aqua mica for the mat pattern
- Red mica for an inside accent (optional, and I’d skip it next time). I used Stardust Red Strawberry from a Stardust mica set.
- A holiday fragrance oil (I used Pumpkin Patch)
Tools
- Plastic taco shell holders (these make the curve)
- Loaf soap mold (about 10 × 2.75 inches)
- Silicone impression mat, cut to 10 × 7.5 inches
- A soft, flexible spatula and a butter knife
- Silicone mat to catch overflow
- Pipettes
- Soap cutter and a vegetable peeler for cleaning up edges
- Spray bottle of 91% isopropyl alcohol
- Thermometer
Fragrance Amount
Use up to 5 ml of fragrance oil per 16 oz (1 lb) of soap base. You can always use less if you like a lighter scent, but don’t go over 5 ml per 16 oz.
How to Make the Curved Mold and Soap
1. Set Up the Curved Mold
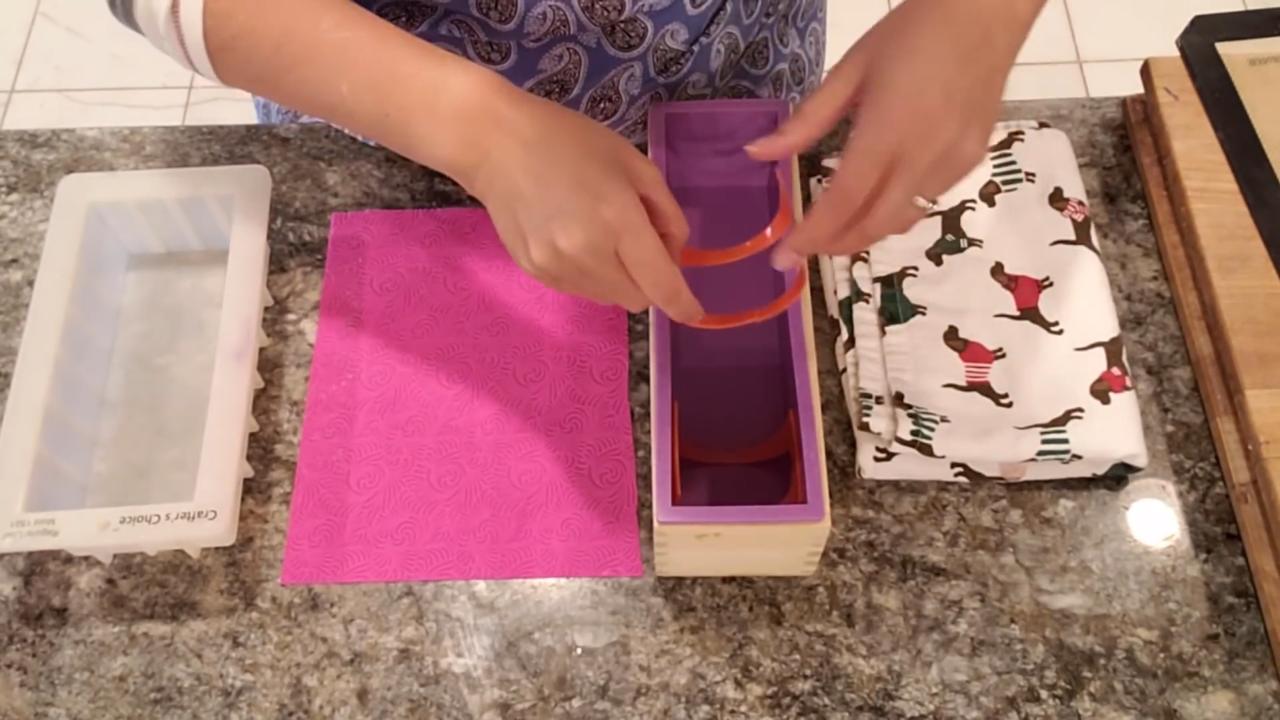
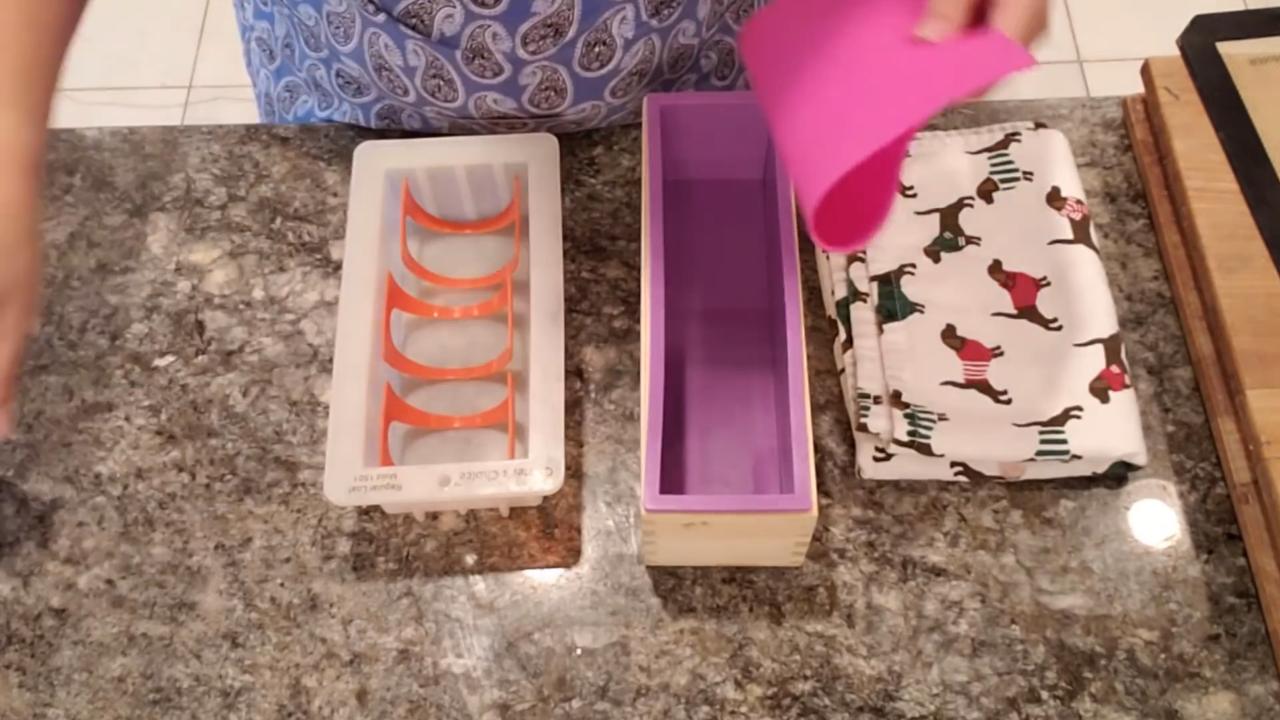
Set plastic taco holders inside the loaf mold. Their curve supports the impression mat so it stays rounded even under the weight of the soap. Three or four holders, kept centered, work well.
2. Cut the Impression Mat
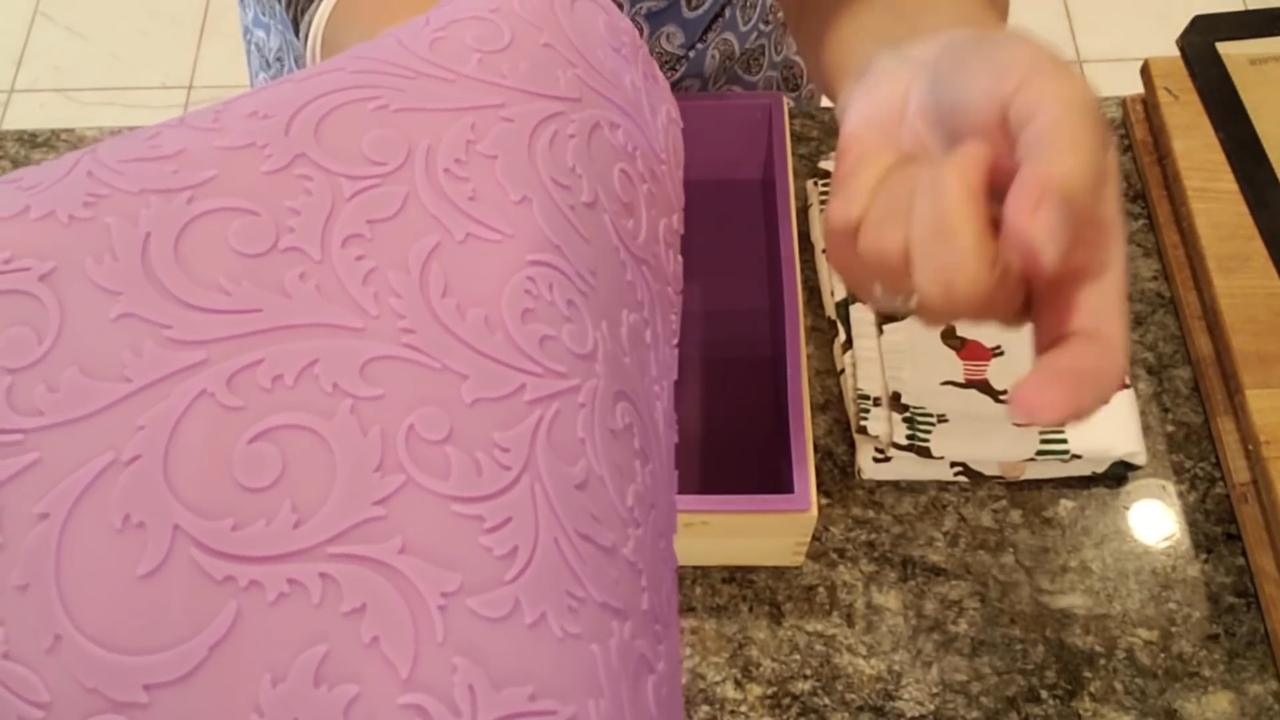
Cut the impression mat to about 10 × 7.5 inches so it fits the mold the long way with an even amount sticking up on each side. A fine, shallow pattern holds color best.
3. Color the Mat
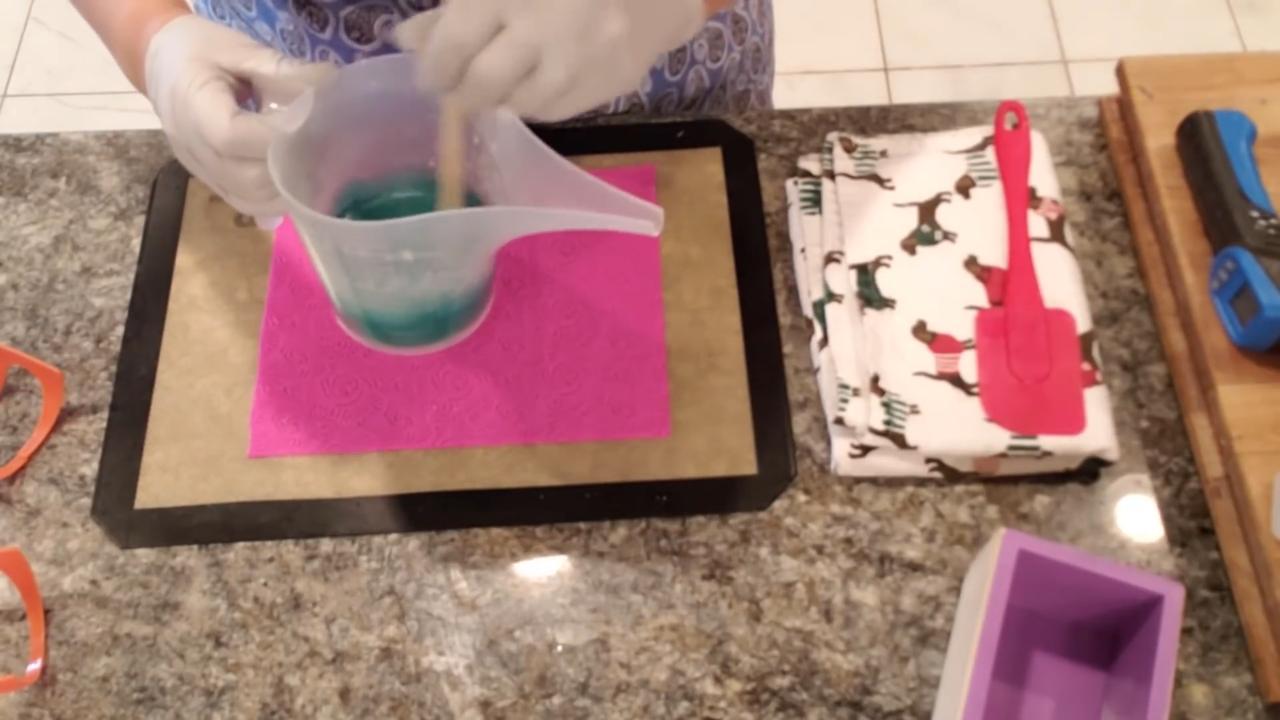
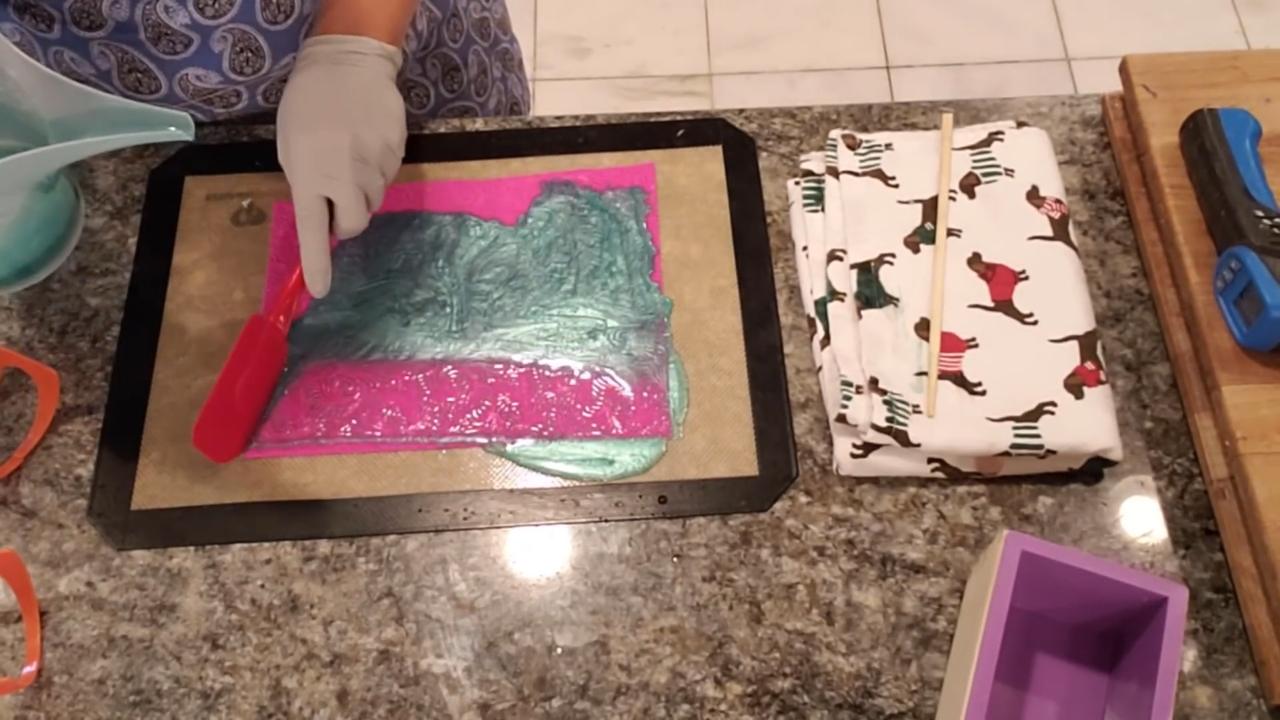
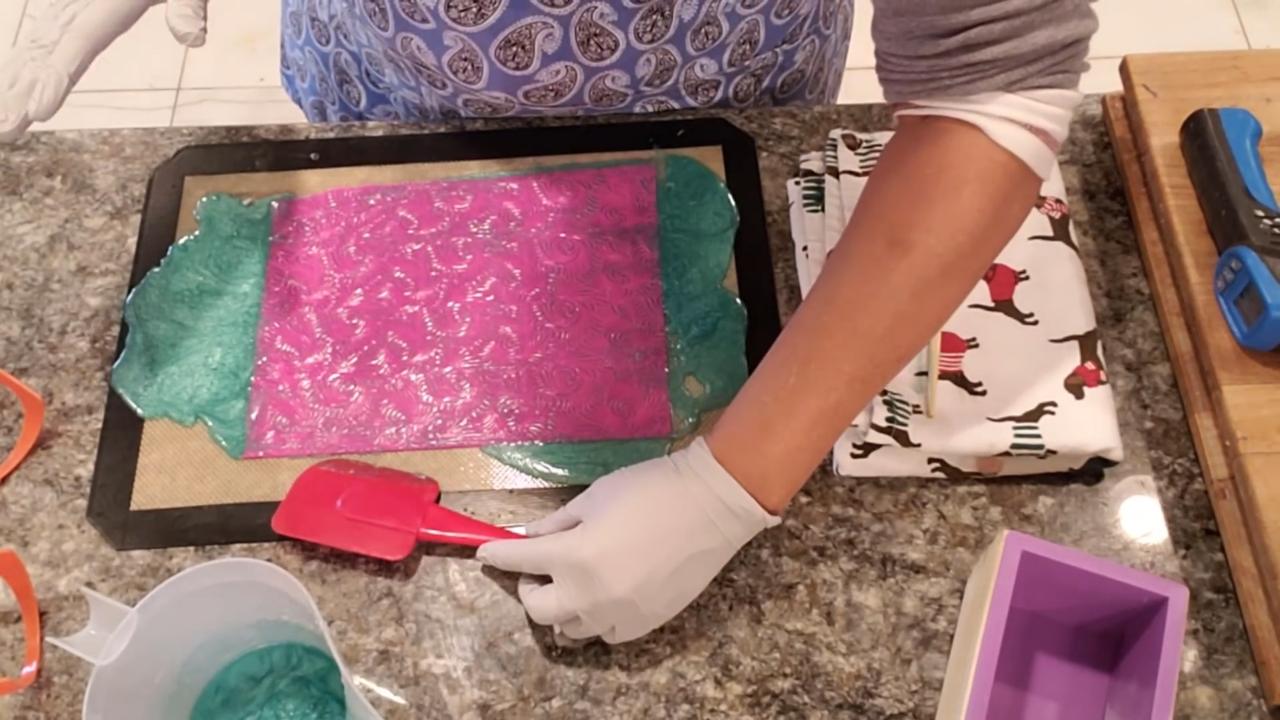
Melt the clear base and stir in the green mica mixed with alcohol. Spray the mat with alcohol and pour the colored soap over the middle of the mat, set on a silicone mat. Then gently scrape it off with a soft spatula so only a thin layer stays in the pattern.
4. Place the Mat in the Mold
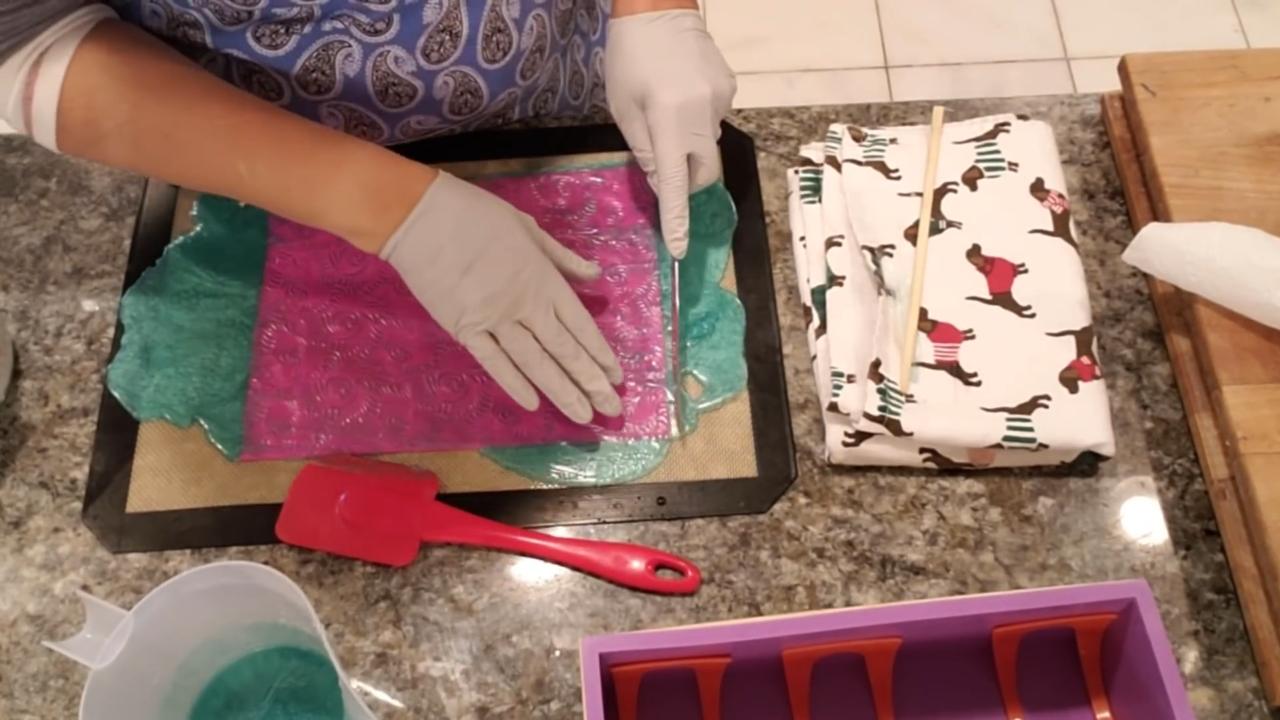
Once the color has dried, run a butter knife around the mat edges so you don’t lift the design when you peel it up. Spray it with alcohol and press it gently into the curved holders, pattern side up.
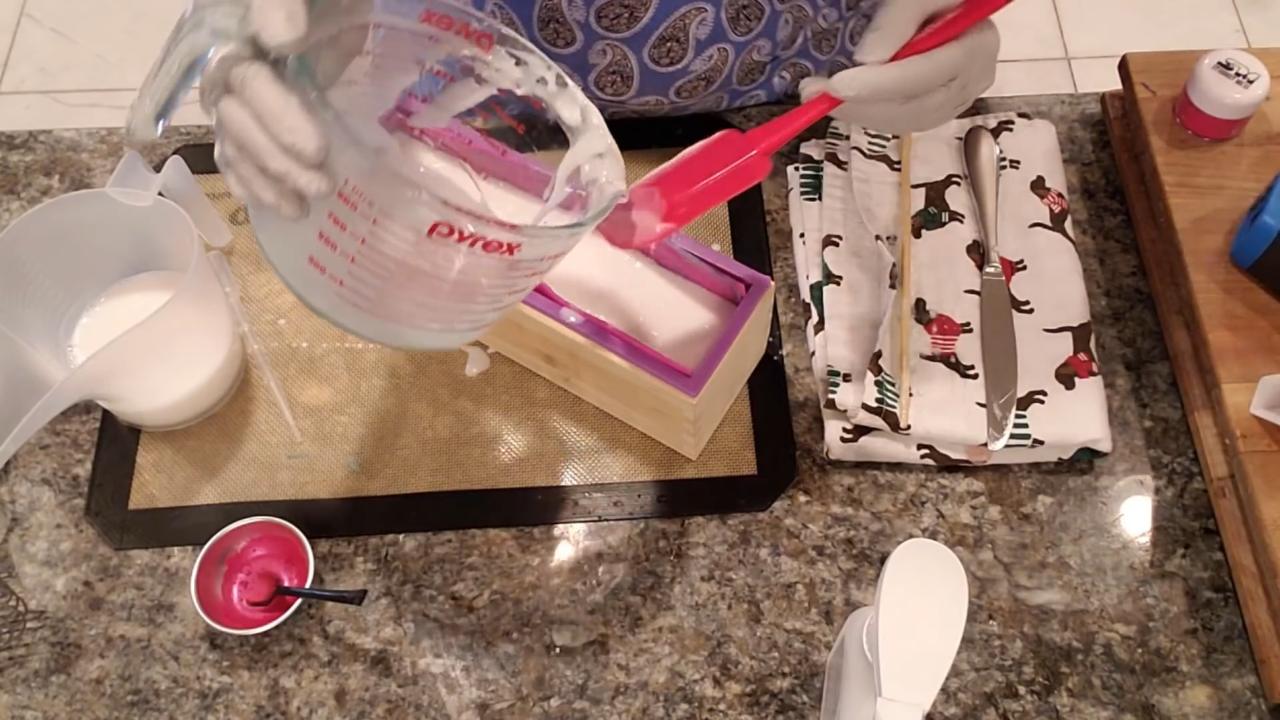
5. Pour the Shea Butter
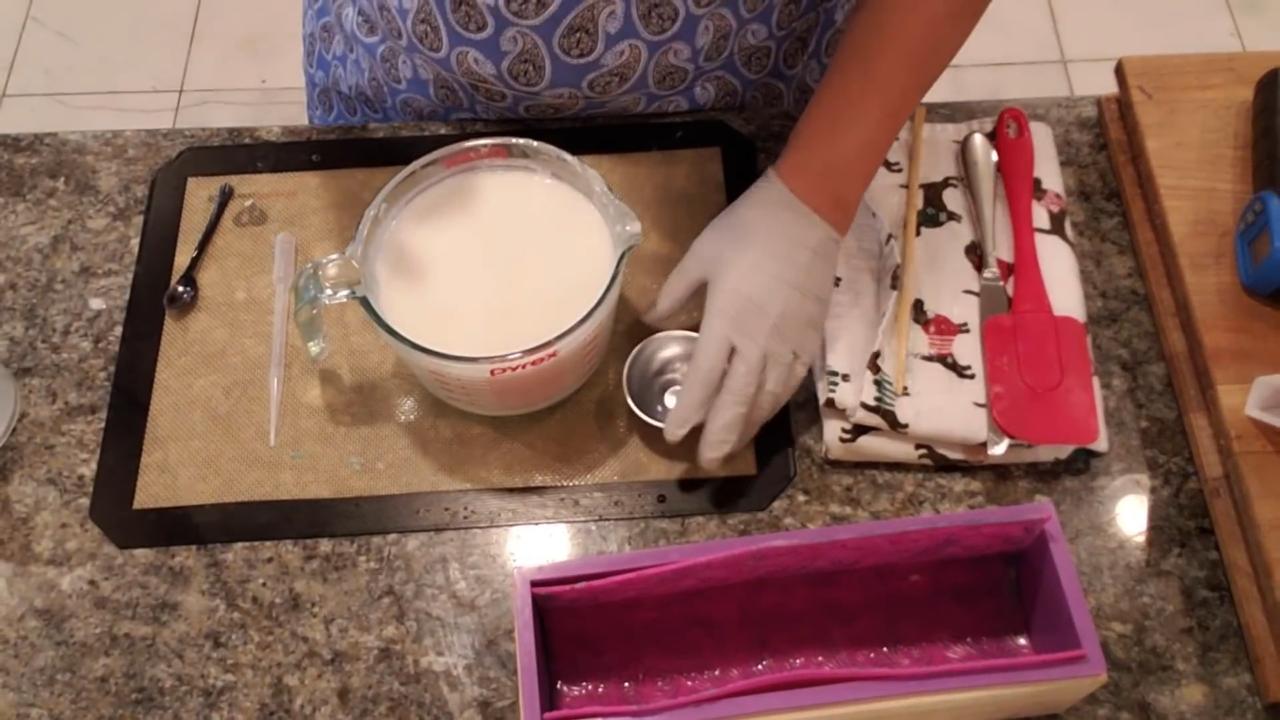
Melt the shea butter base and add fragrance. Let it cool to the low 120s so it doesn’t melt the thin color off the mat. Spray the mat with alcohol and pour gently. Some soap may seep under the mat, and that’s okay.
6. Unmold
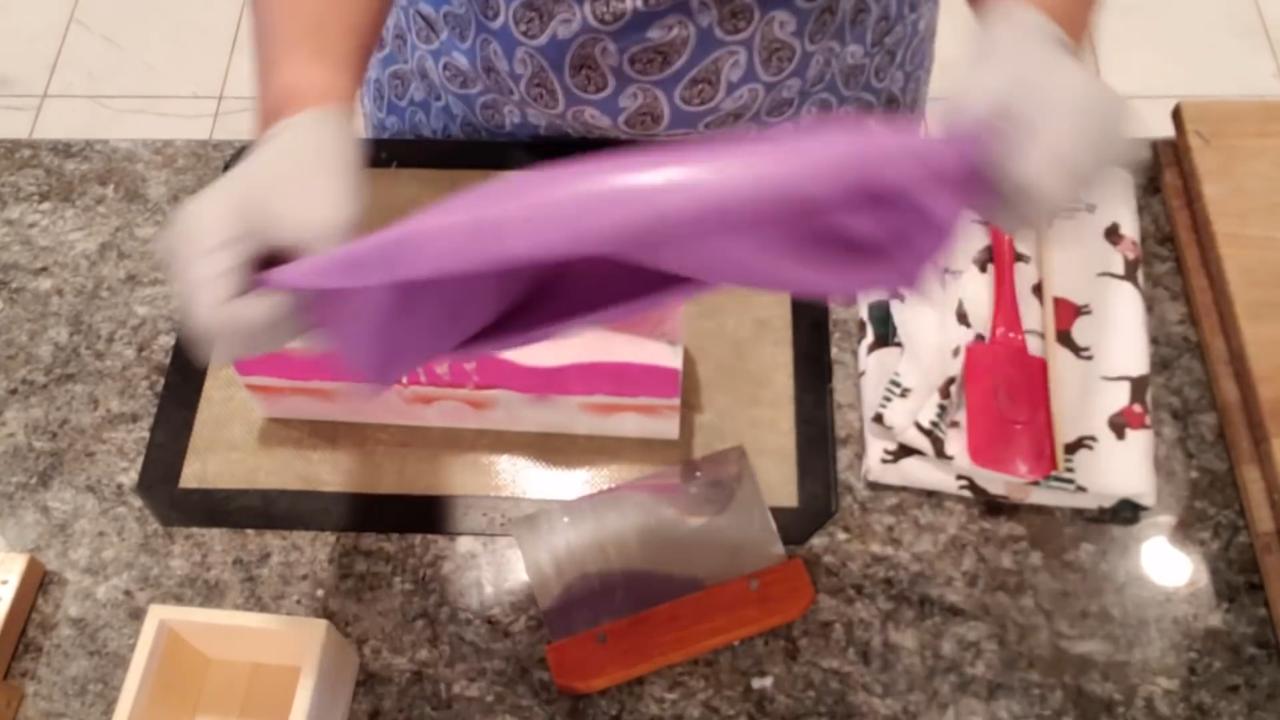
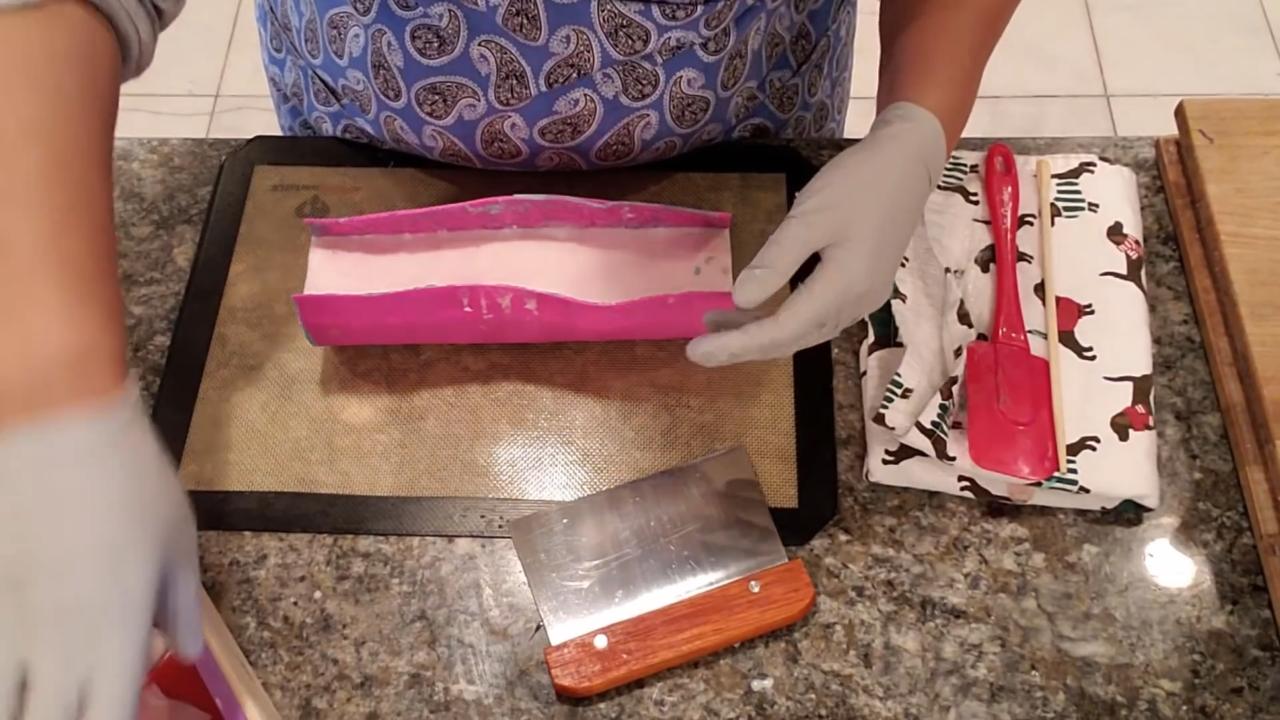
Once the soap is set, lift the mat out of the mold. Lift the taco holders by their tabs carefully, since thin plastic can break. Peel the mat off to reveal the curved, patterned top.
7. Cut and Clean Up
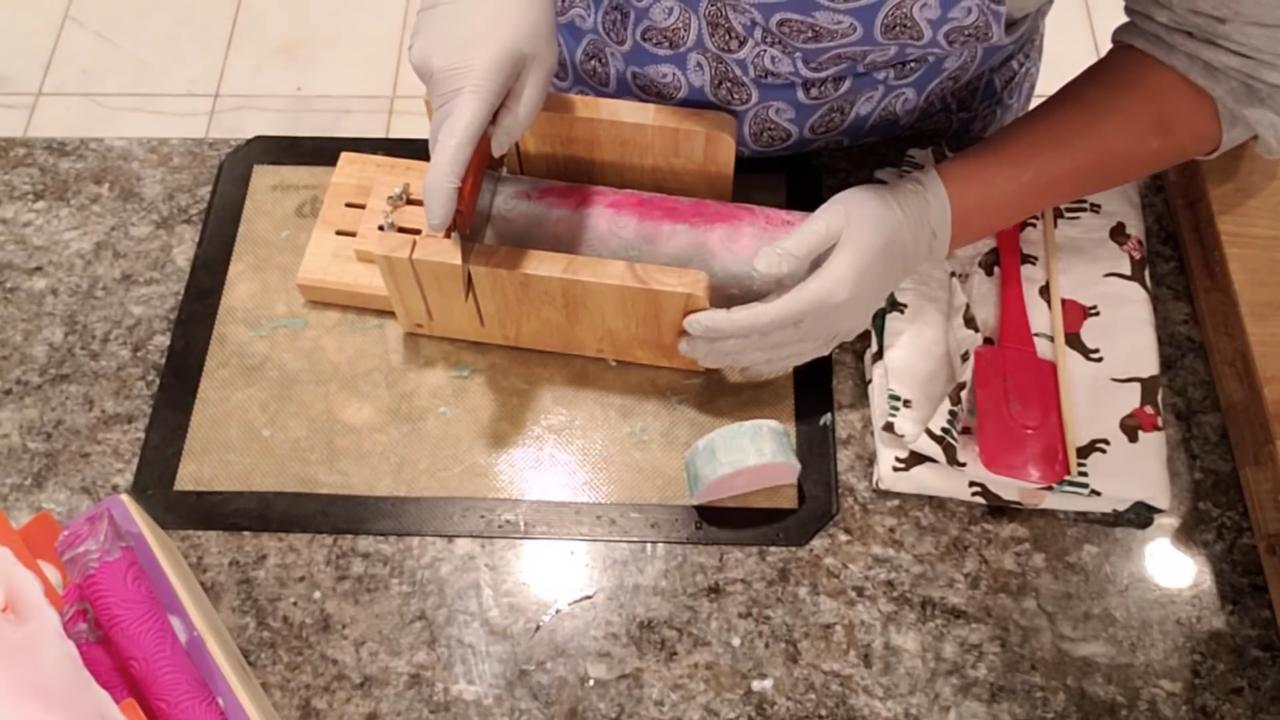
Cut the loaf into bars. Trim any extra soap that seeped around the sides with a peeler or beveler.
Tips & What I Learned
- Taco holders make a great curve. No special mold needed.
- Less is more. The patterned top looks best on its own. Skip the inside swirl.
- Pour cool. Hot soap can melt the thin mat layer.
- Use a fine pattern. Shallow designs hold color better than raised ones.
- Cut around the mat edges. It keeps the design from lifting when you peel it.
Troubleshooting
The colored pattern melted off. The soap was too hot. Pour in the low 120s.
Soap leaked under the mat. That’s normal with this setup. Trim it after cutting.
A taco holder broke. Lift them gently by the tabs and loosen the soap first.
FAQ
Do I need a special curved soap mold?
No. Taco holders inside a loaf mold create the curve for much less money.
Can I skip the color on the mat?
Yes. Even a plain white bar shows off the impression pattern beautifully.
More Impression Mat Soap Ideas
- Blue Ice Melt and Pour Soap with an Impression Mat
- 3 Color Funnel Swirl Melt and Pour Soap
- Soap Embossing Stamps Melt and Pour Soap
- Flower and Lace Melt and Pour Soap
- All my melt and pour soap tutorials on YouTube
If you make this, I’d love to see it! Tag me on Instagram or Pinterest, and subscribe on YouTube for new soap tutorials.
