
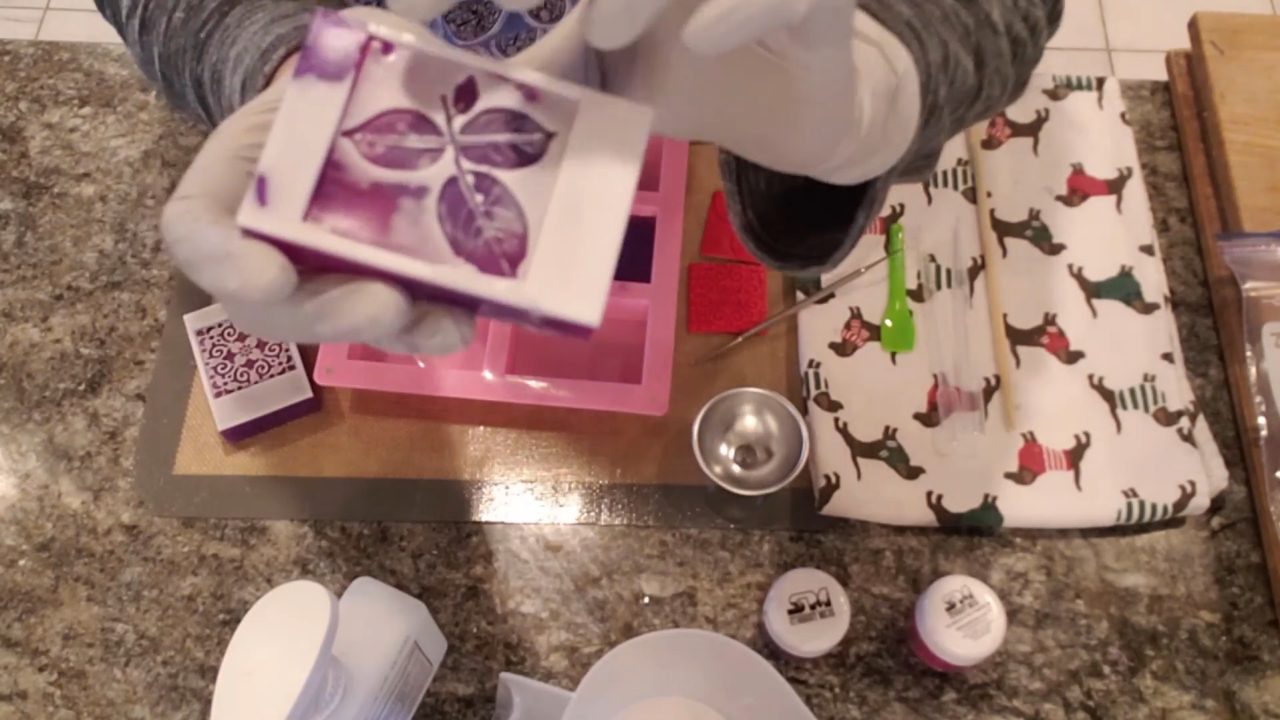
Soap embossing stamps are an easy way to add a raised design to melt and pour soap. You lay the stamp in the bottom of the mold, pour a thin white layer, scrape it off the raised parts, then fill the mold with color. When you pop the soap out, the design shows up in white against the color. This was an experiment to see if real soap stamps work as well as the silicone card-making stamps I tried before, and they did.
As an Amazon Associate I earn from qualifying purchases. Some links in this post are affiliate links. They cost you nothing extra and help support Koala Soap.
Materials & Tools
Soap Bases
- Shea butter melt and pour soap base (left white, for the stamped design)
- Premium clear melt and pour soap base (for the color)
Color & Scent
- Sunset Pink and Violet Petal from this Stardust mica set or individual Stardust micas
- Fragrance is optional. I left it out because this was a test, but Barnhouse fragrance oils are a good choice.
Tools
- Soap embossing stamps (mine came in a pack of 8 different designs)
- 6 cavity silicone soap mold
- Pick tool for pulling the stamps out without chipping the soap
- A small flexible spatula for scraping
- Spray bottle of 91% isopropyl alcohol
- Thermometer
- Pipettes and small cups for mixing mica
Fragrance Amount
If you add scent, use up to 5 ml of fragrance oil per 16 oz (1 lb) of soap base. You can always use less if you like a lighter scent, but don’t go over 5 ml per 16 oz.
How to Use Soap Embossing Stamps in Melt and Pour Soap
1. Place the Stamps in the Mold
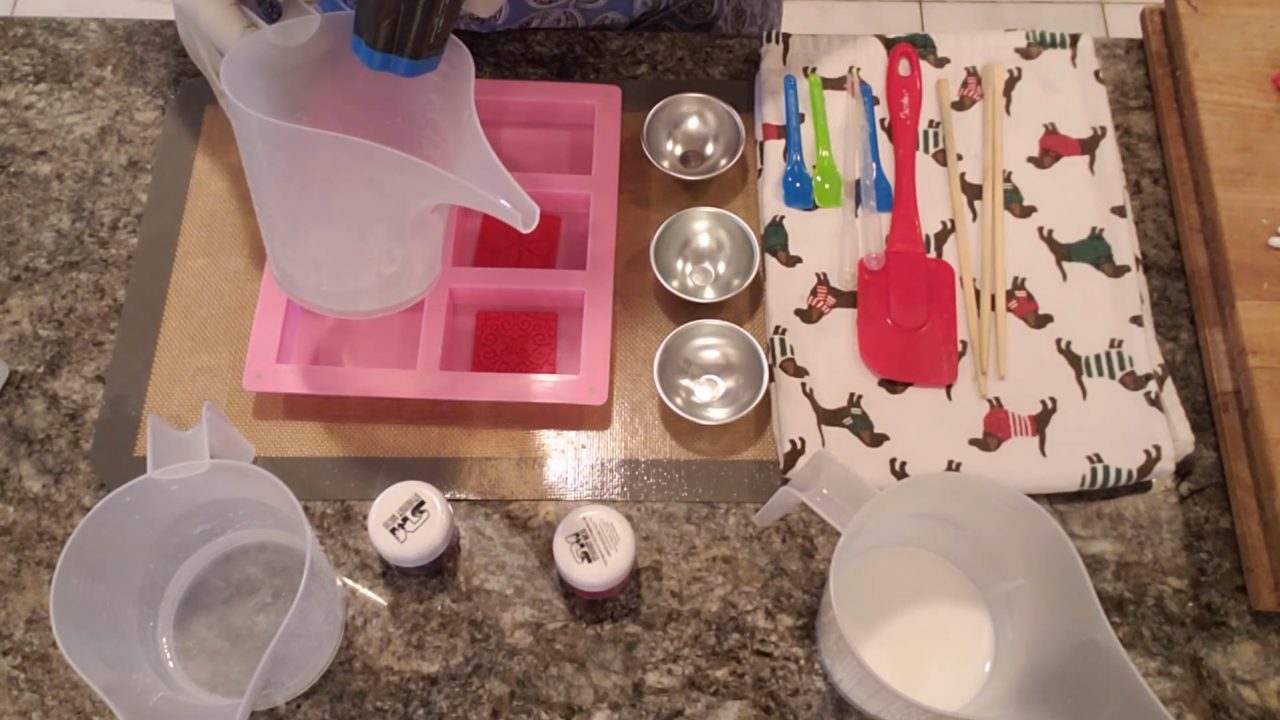
Set a stamp in the bottom of each mold cavity, design side up, and center it. These stamps sit snugly in the cavity and don’t slide around. Stamps with large raised areas show more color through the design. Stamps with fine raised lines give you more white.
2. Pour a Thin White Layer
Melt the shea butter base and leave it white. Mine was around 160°F. Pour a little over each stamp so it flows into all the low spots.
3. Scrape the Raised Areas Clean
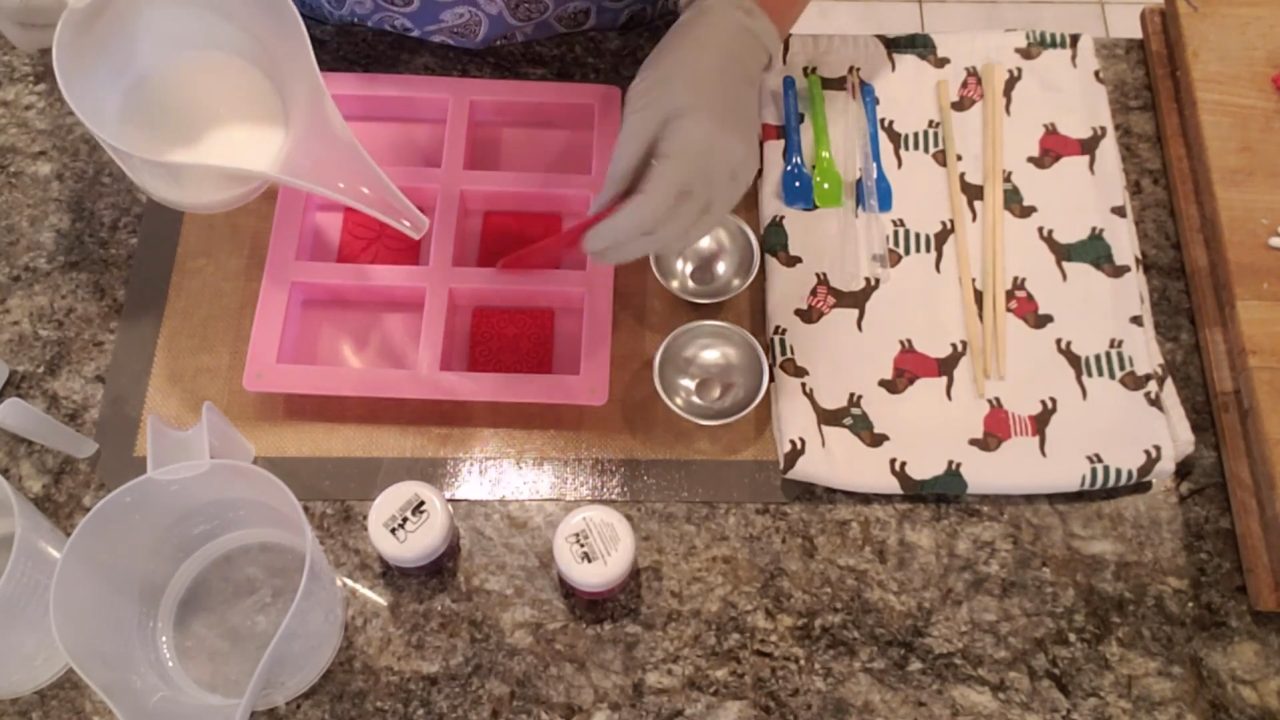
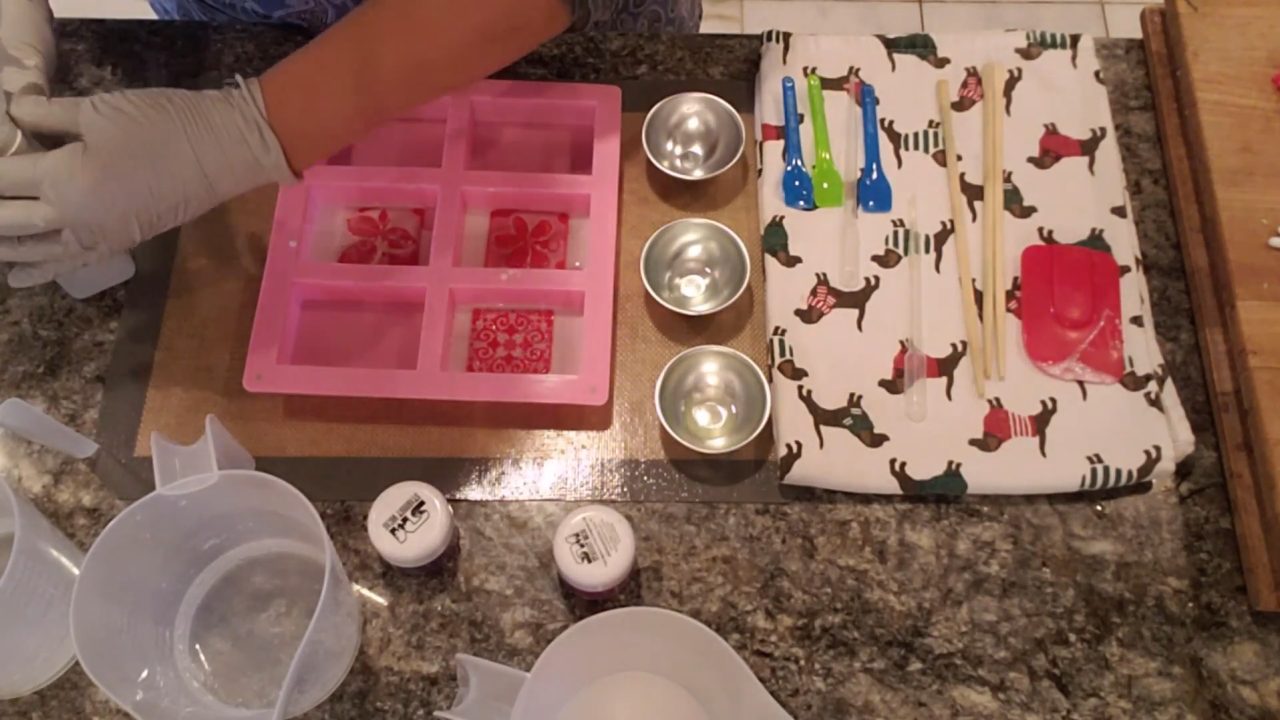
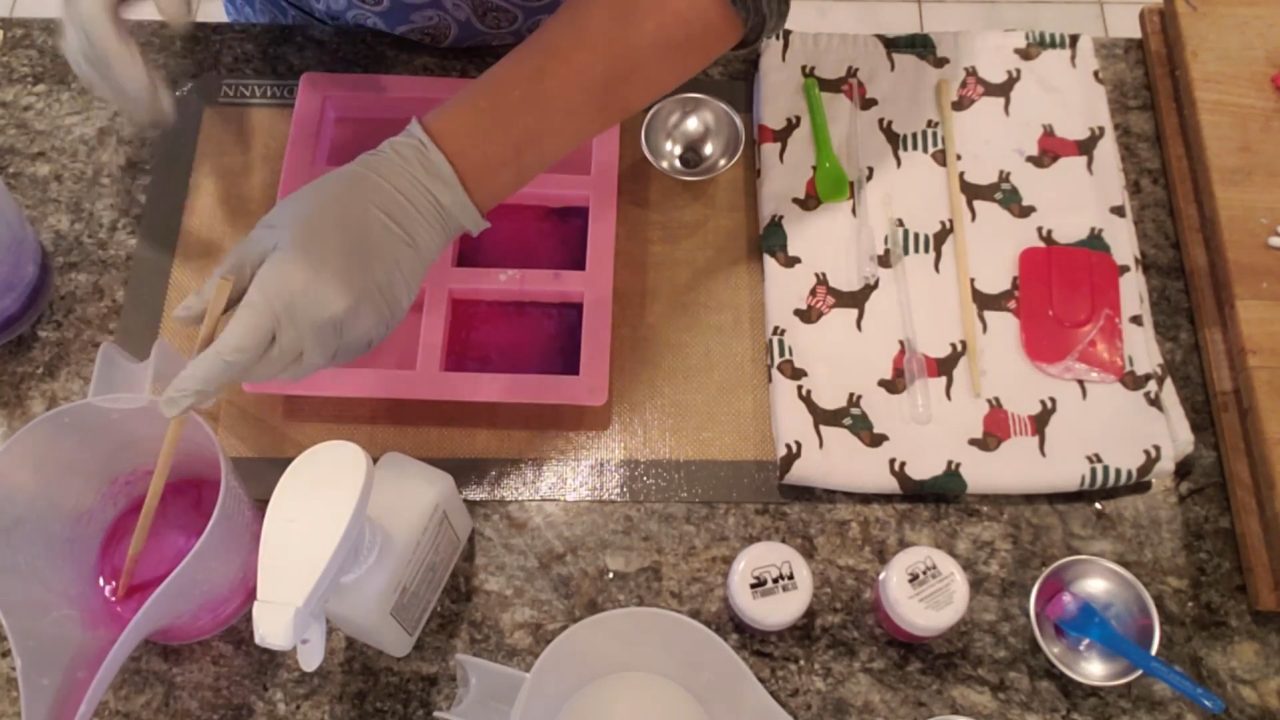
Right away, scrape the white soap off the raised parts of the stamp with a spatula, so the white stays only in the grooves. It doesn’t need to be perfect. Any white you leave behind just blends a little with the color. Spray with alcohol and let it set.
4. Mix the Colors
Melt the clear base and split it into two cups. Mix Sunset Pink into one and Violet Petal into the other. Sunset Pink looks like a translucent purple-pink with a bluish shimmer in clear base, and it’s great for mermaid soaps too.
5. Pour the Color
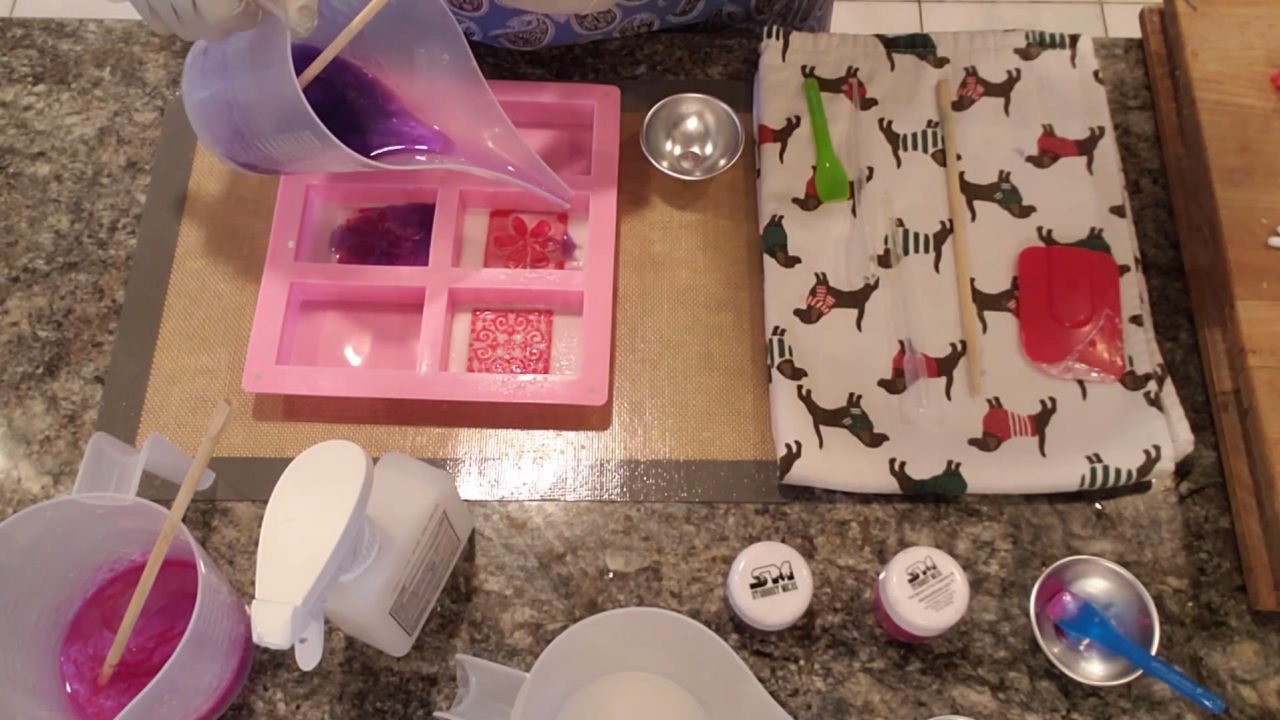
Let the colored soap cool to around 125°F so it doesn’t melt the white layer. Warm it for about 10 seconds if it gets too thick. Spray the white layer with alcohol, then pour the pink into half of each cavity and the purple into the other half. Try to keep skin out of the pour. Spray the top with alcohol and let it set.
6. Unmold and Pull the Stamps
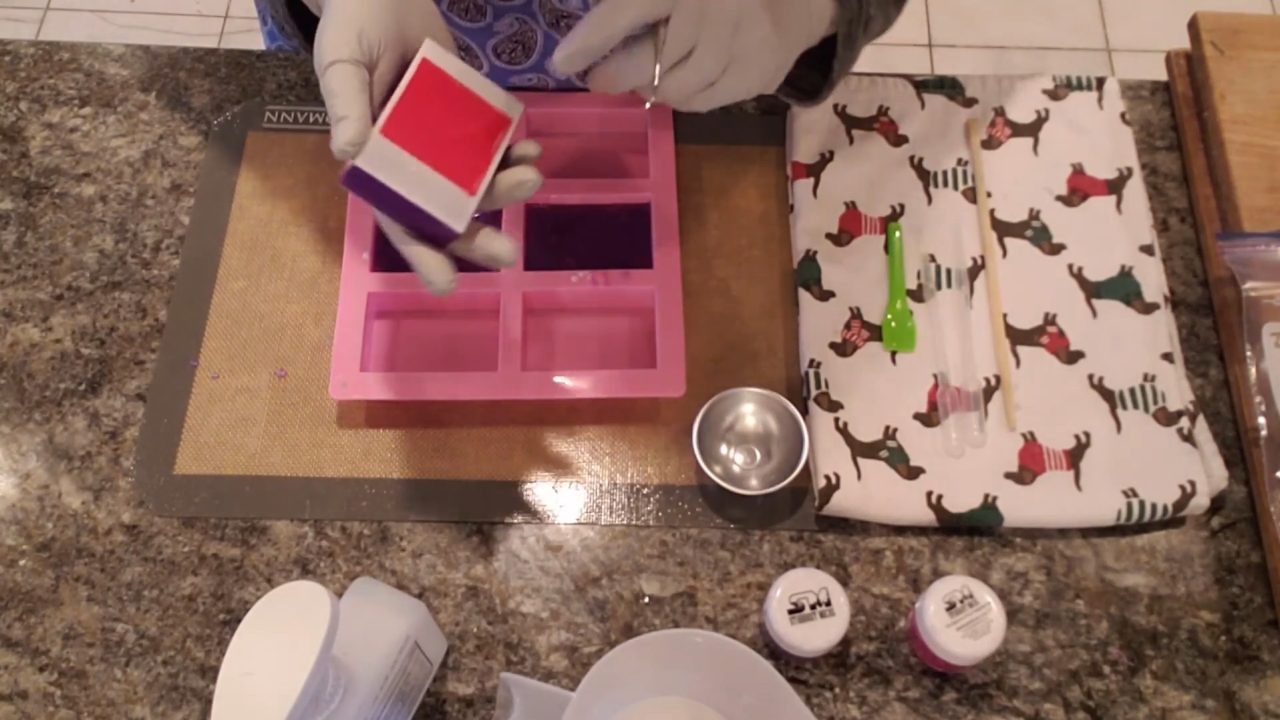
Once the soap is hard, unmold it. These stamps are stiffer than silicone card-making stamps, so use a pick tool to lift them out instead of your fingers, which can chip the soap. Work slowly. If a little soap pulls up at the edge, press it back down. You can trim a messy edge with a knife.
Tips & What I Learned
- Pick contrasting colors. Pink and purple were a little too close to tell apart. Try purple and yellow, or green and yellow, so the design pops.
- Don’t pour the color too hot. Keep it around 125°F so it doesn’t melt the white design.
- Use a pick tool. It lifts the stamp without chipping the soap.
- Center the stamp away from the edge. A stamp placed too close to the edge can pull soap up when you remove it.
- Both stamp styles work. Soap stamps and silicone card-making stamps both make great designs.
Troubleshooting
The white blended into the color.
Some white was left on the raised parts, or the color was poured too hot. Scrape more carefully and cool the color to around 125°F.
The soap feels squishy before unmolding.
Give it more time. A trapped air pocket can make it feel soft, but it usually comes out fine.
Soap pulled up when I removed the stamp.
Press it back down while it’s still soft, or trim it with a knife.
FAQ
Do I need to scent stamped soap?
No, but you can. Use up to 5 ml of fragrance oil per 16 oz of soap base, and less is fine.
Can I use card-making stamps instead?
Yes. Silicone card-making stamps work too. Here’s my video using card-making silicone stamps.
Which stamp designs work best?
Designs with larger raised areas show more color. Designs with fine raised lines show more white detail.
More Melt and Pour Soap Ideas
- Blue Ice Melt and Pour Soap with an Impression Mat
- Rose Embed Melt and Pour Soap
- How to Swirl Melt and Pour Soap
- How to Package Melt and Pour Soap
- All my melt and pour soap tutorials on YouTube
If you make this, I’d love to see it! Tag me on Instagram or Pinterest, and subscribe on YouTube for new soap tutorials.
