
Adding embeds to Melt and Pour Soap
Are you ready to level up from making plain melt and pour soaps into something more creative?
Putting embeds in your melt and pour soap is truly a fantastic way to improve your soap craft making skills.
Embeds add flair and uniqueness to every melt and pour soap. They are absolutely easy to do and fun to create.
Let’s get started on turning your melt and pour soaps into art pieces with embeds using this 5-step DIY tutorial.
Things You Need for Embeds Melt and Pour Soap
- Mica Colors (choose at least two)
- 14 ounces of Clear Melt and Pour Soap Base (makes 2 colors of embeds)
- 10 ounces of Shea Butter Melt and Pour Soap Base
- 2 Small cubes silicone mold (I used an ice cube tray with 160 cavities)
- Square soap mold
- Soap Cutter
- 99% Alcohol
- Scale
- Baking Mat
- 3 Funnel Cups
- Digital Thermometer
- 3 small mixing bowls (or bath bomb tin molds)
- 3 spoons for mixing
- Baking spatula or bamboo skewers for mixing
- Fragrance Oil
- Pipette for the fragrance oil
Step by Step Process of Embeds Melt and Pour Soap
Step 1: Melt the Soap Base
Let’s start with the basics – preparing the soap base. In each of your 2 funnel cups, melt about 6 to 7 ounces of clear butter melt and pour base in the microwave for 10 seconds at a time until completely melted. It is important not to overheat your base.
Once melted set aside. I usually add my colorants at about 170 degrees Fahrenheit. Use the digital thermometer to check for the temperature. If you do not have a digital thermometer, you should be able to tell by stirring with a chopstick that the base is becoming thicker.
Step 2: Choose Colors
Next, grab a small spoon on some type, (I use spoons from our local yogurt shop and just ask for a couple extra spoons when paying). Put a small amount of alcohol in a small bowl, I use a bath bomb mold. Add a small amount of the mica powder. Note: if you are using a liquid colorant than, you can skip this step.
In this tutorial, I used yellow gold mica from StarDust Micas. Pour the colorant into the melted clear soap base and mix well using a bamboo skewer or a stirrer. Ensure that there are no lumps before pouring. If there is a lump, keep stirring to help it dissolve due to the heat.
Create your second colorant by choosing another mica color and mixing it with some alcohol. I used a blue mica to contrast the first color which is yellow gold.
You can choose more colors, and even create a rainbow embed melt and pour soap! Don’t be afraid to use your favorite colors, contrasting colors and complimentary colors.
Another good idea is to choose shades of the same color, such as in the color blue you can choose royal blue, sky blue, teal, and cobalt. If you are making an embeds melt and pour soap as a gift, think about the person’s favorite colors, or the colors that represent the event (e.g. red for anniversary or Valentine’s day, black and yellow gold for college graduation, etc.)
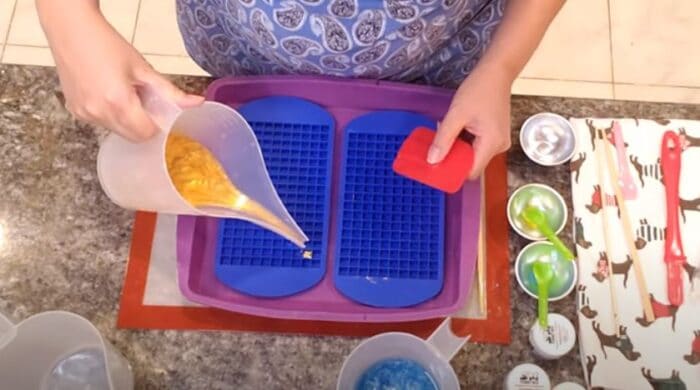
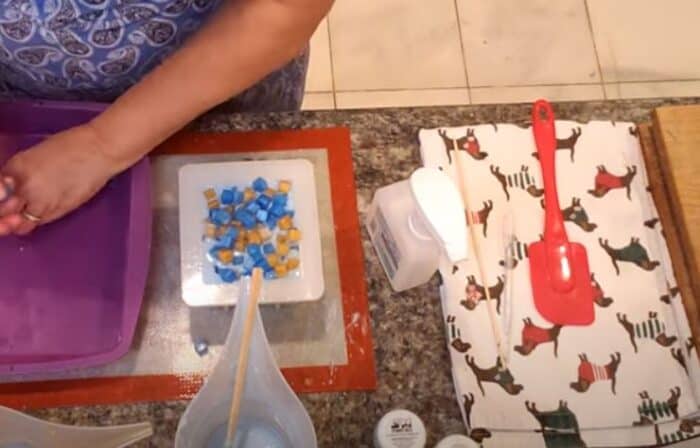
Step 3: Create the Embeds
Time to make the star of your melt and pour soaps – the embeds! Mix the colorants into the heated melt and pour soap base and stir well using a bamboo skewer. Pour one of the colored mixtures into the small cube silicone mold. Get your baking spatula and even out the surface and fill in other small cavities. You may also remove the head of your baking spatula to do this step. Get your other small cube silicone mold and fill it with your second colorant. If you only have one small cube silicone mold, you may pour one colorant on one side, and the other colorant on the other side. Set the molds aside to cool down. Unmold them when the embeds have solidified and put in one container.
Step 3: Prepare the Shea Butter Melt and Pour Soap Base
Melt 10 ounces of shea butter soap base in a funnel cup and stir well. Create your colorant by mixing 1 teaspoon of mica with alcohol, then pour into the melted soap base. The color of the mica depends on your preference, but ideally, choose one of the two or more colors you used in step 3. In this tutorial, I used Arial blue mica and it turned into a sky blue shade, which is lighter than the Ariel blue embeds that were made with clear melt and pour soap. This will always give you a darker color. Stir well until you reach around 130 degrees Fahrenheit or lower.
Step 4: Add the Embeds
Spray some alcohol into the colored shea butter mixture. Pour about 3 ounces of this mixture into the large single cavity mold. Spray some alcohol on the embeds.
Add a layer of embeds on the shea butter mixture and spray some alcohol on the top. Cover it with 3 ounces of the shea butter mixture. Repeat this process until you reach the top of the mold.
Add the remaining embeds as toppings. Drizzle the rest of the melted shea butter soap on the top to create a glazed effect. This will also help keep any loose embeds in place. If you a bioglitter type of soap maker, now would be a great time to add some bioglitter to the top of your masterpiece.
Step 5: Cut into Soap Bars
Unmold the solidified soap carefully. If you are using the small square mold that I use in my videos, you need to loosen all the sides and gently work the soap out. You can push on the bottom of the soap as long as it is completely set. If it is still warm, you can add divits to the bottom of the soap and it will not be completely flat.
Place it on the soap cutter and cut into equally-sized soap bars. Enjoy your new artisan embeds melt and pour soap!
Here’s a link to the video on how to make embeds melt and pour soap:
