
Melt and Pour Soap Making. Saving a soap design
Ingredients:
- 20 ounces of opaque melt and pour soap base
- 1-2 ounces of clear melt and pour soap base
- Mica powder
- Fragrance or Essential Oil
- Isopropyl Alcohol
One of the great things you can do with Melt and Pour soap is if you make a mistake, you can always redo the soap or salvage the soap so that there is no waste.
I recently made a soap that I really didn’t like. I liked the colors and the concept was good but it just didn’t work out in real life instead of wasting the soap, I decided to revamp the soap.
Saving the Soap
So today I took one of my favorite molds, mainly because it is the best for testing new recipes because it’s small.
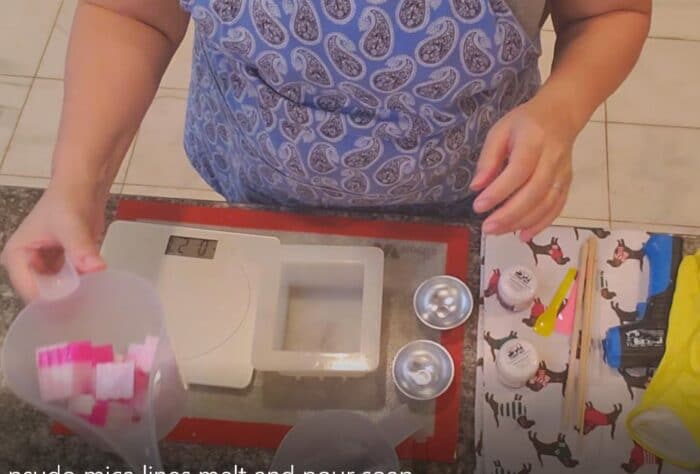
It will take approximately 20 ounces of soap. So I decided to split it into three as I would be doing 3 layers of soap. I also wanted to add a little bit of contrast, so I decided to do a pseudo mica line using Stardust Micas gold.
The fragrance of the old soap was Love Spell. It is really a wonderful smelling fragrance oil for soap. It’s one of my daughter’s new favorites. These soap scrapes were recently made and already had the fragrance in them. For that reason, I did not add any more.
I went ahead and took this soap that I previously made an measured it out in seven oz using my kitchen scale and my funnel cups. I would be doing this three times as this mold will take about 20 oz of soap. The soap that I am saving was Shea butter melt and pour base.
I am also using a glycerin base for my contrasting color. I am only using about 1 to 2 ounces of the glycerin base as I only want very thin lines between the layers.
I heated up the Shea butter soap scraps in the microwave for about 20 seconds make sure you cut them into small chunks they melt much faster.
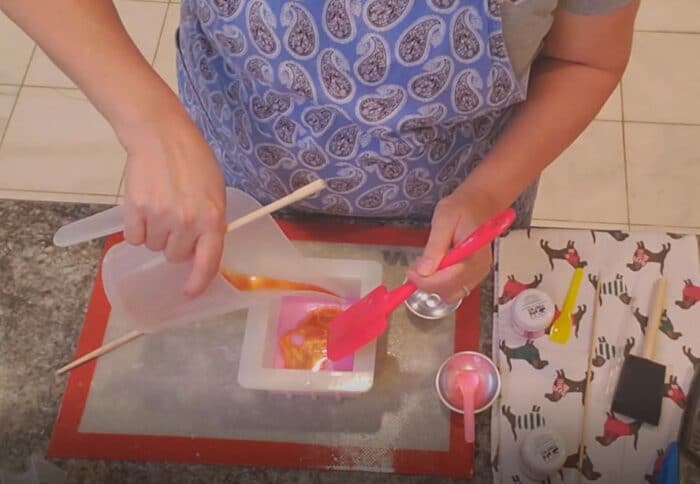
I then poured my first layer into the mold and waited it to cool down. I needed a thick skin on the Melt and Pour that was poured in the mold so that I could pour the gold colored glycerin on top of it without it falling through in mixing with the pink layer. I tend to be impatient waiting and I almost had disaster number 2. It is ok to wait for the pink layer to completely set before pouring the gold layer.
Before I pour the gold layer on to the pink layer I added small hatch marks on the soap itself to help the gold layer adhere to the first layer better. I also spritzed with a small amount of alcohol. The concentration of the alcohol is best at higher than 90% but the 70% will also work.
Once the gold layer had set i went ahead and repeated the process with another pink layer of 7 ounces of my melt and pour scraps. I continued this process until the mold was full and let it set.
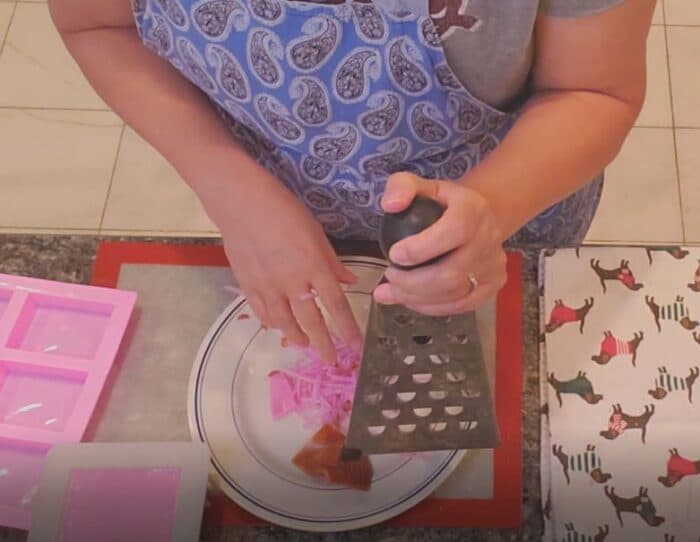
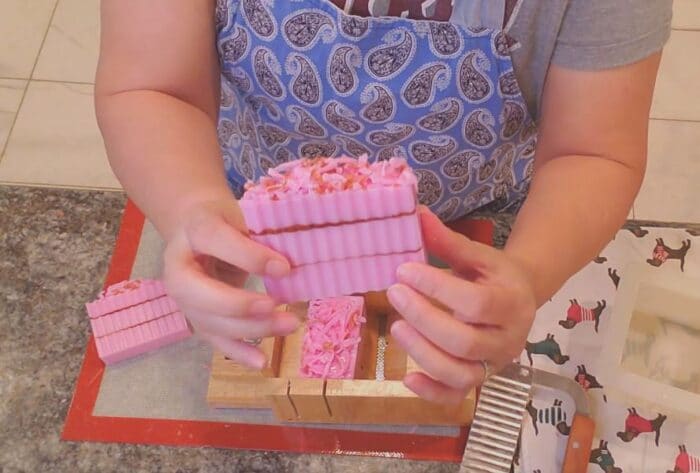
I decided that I wanted some kind of decorative top on the soap. I took the remaining scraps and shred them. I then added the scraps to the top of the soap and added a little more melted melt and pour soap to make the top adhere.
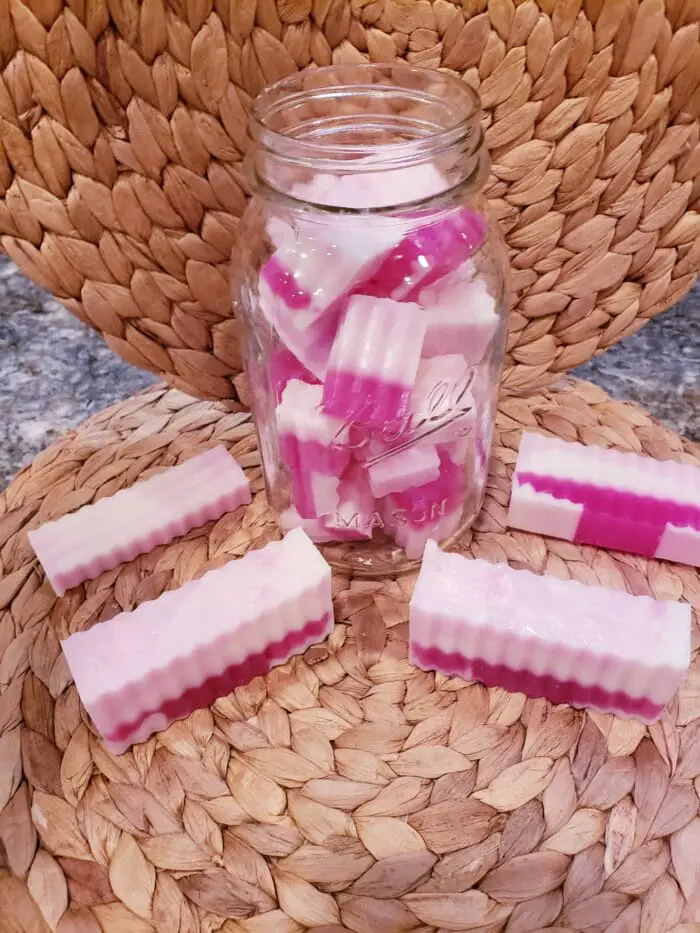
Once the soap is completely hardened you can go ahead and put it in your soap cutter and start cutting it.
I prefer to use a waffle blade on this design only because it adds more depth and makes the design just a little bit more interesting.
Because this is Melt and Pour Soap, and I live in a very hot place it is possible for the soap to start to sweat if it stays out for too long.
For this reason, I will make sure that the soap is cool to touch And I will go ahead and shrink wrap it so that it does not start to sweat. I also tend to use low sweat soap bases to help alleviate this issue also.
I love the final result, and it is what makes me a wonderful fan of melt and pour soap.
Mistakes will always happen but it is a very forgiving art which I appreciate very much.
