
Making Melt and Pour Soap for Beginners Summer Flowers
Supplies Needed
- Clear Melt and Pour Soap Base – 8 ounces
- Opaque Melt and Pour Soap Base – 21 ounces (I use Shea Butter melt and pour soap base)
- Mica Power (I used Cosmic Blue and Violet Purple from StarDust Micas)
- Square Mold approximately 22 ounces
- Isopropyl Alcohol
- Funnel Cups
- Silicone Mat to hold soap
- Scale
Step one
Fill two of the funnel cups with 4 ounces of clear melt and pour soap base. This will total 8 ounces.
Next fill two more funnel cups with 4 ounces of your opaque melt and pour soap base. In this design I used Shea Butter melt and pour soap base. Not to be confused with raw Shea Butter.
Melt all four soap bases down using microwave. Only do in ten second increments so that you do not burn the melt and pour cases.
Once completely melted down. Take your fragrance oil and distribute 5 mL’s of fragrance oil between the four cups .
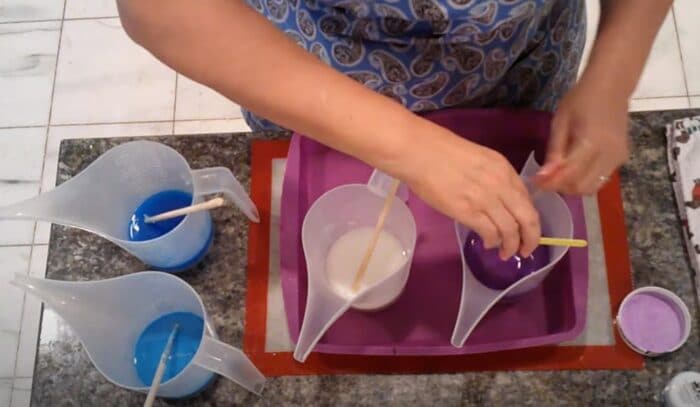
Mix a small amount of your mica powder with isopropyl alcohol, this will make sure the mica is thoroughly mixed.
Pour each color into a separate melted soap base. You should have 4 colors after this. Please refer to the video below.
Step 2
Once the soap bases are at 120 degrees Fahrenheit or below it is time to start pouring onto your silicone mat.
Pour and opaque base first as it takes the longest to develop a skin. Pour just a small amount. Once a small skin develops pour your second color.
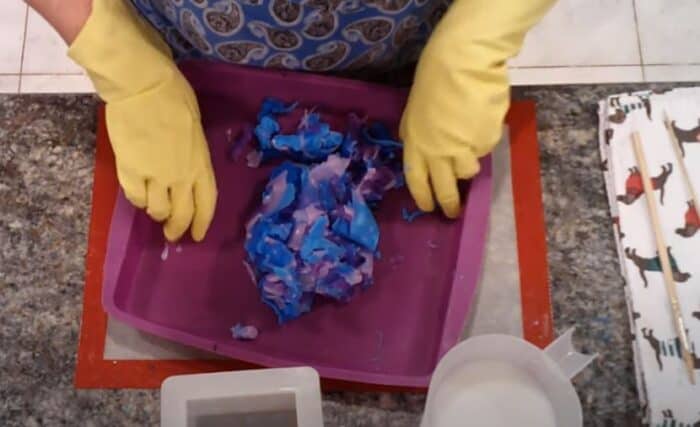
Continue pouring until you have poured all your colors onto the silicone mat. If your melt and pour soap bases set up and are no longer pourable, simply put on some gloves and scrap it out of the funnel cup distributing it evenly throughout your soap design.
Let cool for about 30 – 45 minutes.

Step 3
Once your soap base is completely set you can start to mold it into a ball form in place it into your square silicone mold.
Make sure that it is placed evenly and that it has not displaced the mold in any way you can readjust the mold as needed to make sure that the square shape has stayed true to form.
Step 4
go ahead now and melt your opaque melt and pour soap base that is 13 ounces in the microwave for 10 second spurts only, to make sure that you do not burn the base.
Stir the base and make sure that there are no clumps inside the funnel cup.
Make sure to check the temperature frequently until the base reaches a temperature of 155- and 160-degrees Fahrenheit.
Make holes in the square mold that hold sure colorful soap base with a chopstick, this will allow your melt and pour to go through to the bottom.
Start to pour your opaque melt and pour soap base into the mold slowly and evenly trying to make sure that you pour into all of the holes.
If you have any additional soap base leftover, place in a 6 cavity mold for later use.
Manipulate and bounce the square mold until all the air bubbles have reached the top and spray with alcohol.
If you are short on alcohol you can poke the bubbles with a skewer this will work until the soap base gets thicker.
Step 5
Wait about two to three hours until your soap has completely set and no longer feels warm to touch in the mold.
Demold carefully by pulling the sides of the mold apart and pushing on the bottom until the soap eventually will come out.
Here is a video that shows you these steps.
Happy soaping

I really love your tutorials, and the colors you choose. I am thinking of doing this with Fall colors. Wish me luck. I am not very good at choosing the right colors that seem to go together well, like your daughter does.
Thanks for your kind words.