
Melt and pour soap design
Supplies Needed
- Melt and Pour Soap Recipes | Earth
- Melt and pour soap design
- Supplies Needed
- 22-24 ounce square mold
- Mica (your choice of colors) I used Star Dust Micas Green Lightening and Arial Blue
- 17 ounces Shea Butter melt and pour soap base (or any opaque soap base)
- 8 ounces Clear melt and pour soap base
- Silicone mat or nonstick surface
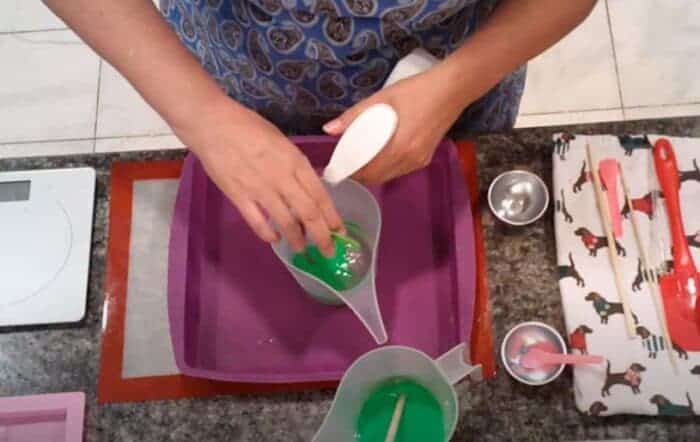
Step 1
Take your four funnel cups and place 4 ounces of clear Melt and pour base into two of the funnel cups, this will equal 8 ounces in total (4oz in each cup). Next, you will take 4 ounces of the Shea butter melt and pour and place it in each of the other two funnel cups equaling 8 ounces.
Heat the melt and pour bases that are in the funnel cups in the microwave for 10 second spurts each, important to not overheat.
Mix your mica powders with alcohol in your bath bomb molds or some other container. Place your mica colors into the melted melt and pour in the funnel cups.
Step 2:
Continue stirring your melted melt and pour base in the funnel cups until all clumps are melted down.
Once the temperature of the melt and pour base in the funnel cups is at 130 degrees Fahrenheit or less it is time to add your fragrance oil.
My rule of thumb is to add 5mL of fragrance oil per pound of soap base. Since we have 16 ounces of melt and pour in our funnel cups distribute the five mL’s equally between all four cups.
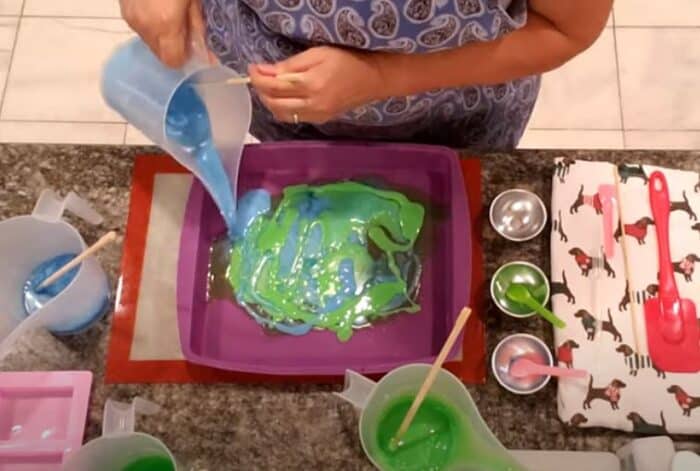
Step 3
Grab your nonstick surface mat or pan and start to pour the opaque melt and pour soap base just a little at a time. Opaque bases take longer to cool enough to get a skin, this is why I pour it first. Wait till your first layer develops a slight skin, then pour your next layer which will either be the clear melt and pour or the other opaque melt and pour base. Continue doing this until you have used all your melt and pour base that was in your funnel cups. You can spray in between with alcohol if you would like but it may not really matter as you will be squeezing and pulling it all apart anyway.
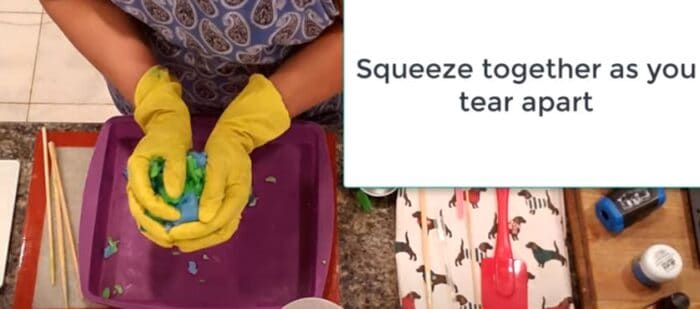
Step 4
Once the soap on your non surface pan sets. Put on some gloves and grab the soap by the edge folding up squeezing and pulling the entire time. The goal here is to press all the melt and pour layers into each other while also pulling it apart so that is completely mixed.
Now start to form a ball with the melt and pour soap base that you pulled up and grab your small square silicone mold. Place the soap ball into the square mold an adjust as necessary so that it all fits into the mold.
Step 5
Now it’s time to grab your Shea butter or opaque melt and pour 13 ounces and melt it down In the microwave at short 10 second spurts until completely melted. You want this to be at a higher heat as you want it to melt through your ball of soap that you have already placed in the mold. I usually do not add fragrance to this as it is too hot and it will usually just burn off wasting your fragrance oil. There is enough fragrance oil in your ball.
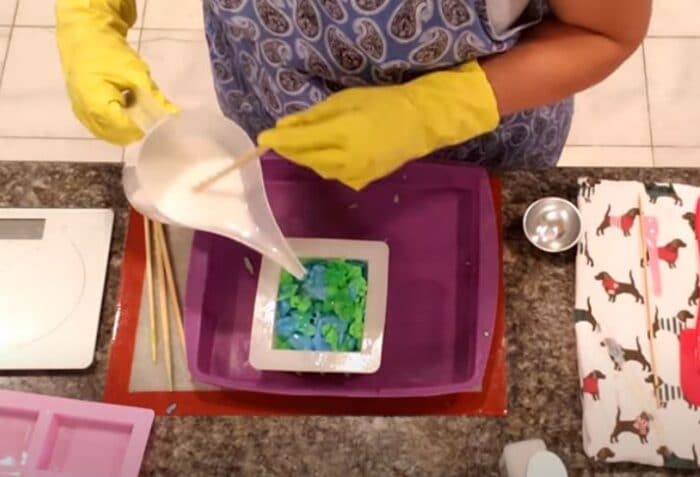
Step 6
When you’re melted opaque melt and pour is between 170- and 180-degrees Fahrenheit, it will be ready to pour onto your ball. But, first you will need to poke holes in your ball so that the melted melt and pour will go through an get through all the layers in your ball of soap. I use a skewer for this, and it works perfectly well.
Pour the heated melt and pour on top of the ball slowly making sure to cover all the holes you just poked into the ball. At this time, you will also want to open and shut the mold squeezing it in manipulating it so that any air bubbles that are trapped can come up and be popped. To do this I would use your alcohol and spray it on top of the air bubbles.
Step 7
The final step is to wait for your creation to completely set. You can put the soap in the refrigerator or just let it set naturally which will take about two to three hours to be complete. Smaller loaf molds are a little bit harder to get the soap out of, so have patience pull the sides of the soap mold apart gently and then turn upside down and press down onto the soap to attempt to push it out of the mold gently.
This particular soap mold should give you 4 equal slices of soap approximately 1 inch and weigh between 5-6 ounces each.
Below is a link to video that shows you the step by step way to make this soap.
Happy soaping.

I really enjoy watching your videos they inspire me to try new things with soap
Thanks Annette. Happy Soaping
Trying to send you a picture of my soap. Did limoncello Fragrance Oil in yellow and green.