
Making Peppermint Sunrise Melt and Pour Soap
In order to achieve this Peppermint Sunrise melt and pour soap, I start doing the top first which is actually opposite of what you would usually do.
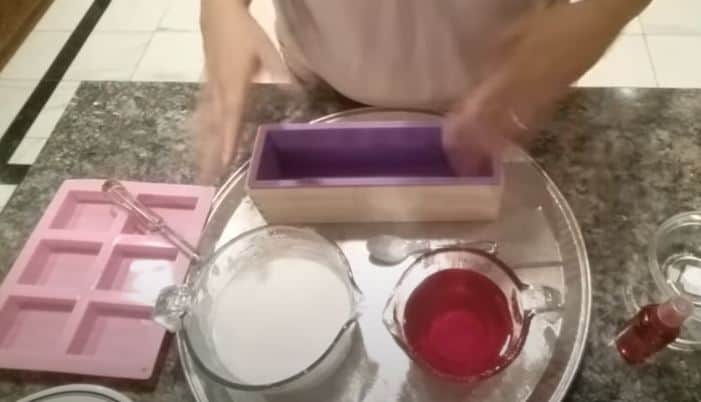
Take clear melt and pour base and heat it in the microwave or double broiler until liquid, then add your favorite red mica or color black. For this soap I used a color block called Stained Glass Santa and mixed it into the melted soap base.

Pour the soap into a basic square or rectangle shaped silicone mold.
Spritz the top of the soap bars with alcohol. This will get rid of any bubbles.
Set aside the red glycerin soap and wait for the soap to set.
Next, grab any type of opaque and glycerin melt and pour soap base. For this video I used goats milk melt and pour base and crafters choice clear melt and pour base..
Measure the amount of base you need for your soap mold. Place it in a microwave safe measuring Cup.
Melt the bases in a microwave at 10 second bursts until fully melted.
Stir to make sure that all clumps in both bases are melted.
Ideally, you’d want both the opaque and glycerin base to be 150 degrees Fahrenheit or less before adding in your fragrance oil. If you do not have a thermometer, continue stirring the soap until it feels like it is thickening up. The cooler the base gets the thicker it gets.
Once your soap bases are below 150 degrees Fahrenheit, go ahead and measure out your fragrance oil for my soap here I use 5 mLs per pound of soap. You can always add a little less depending on your fragrance oil or your taste.
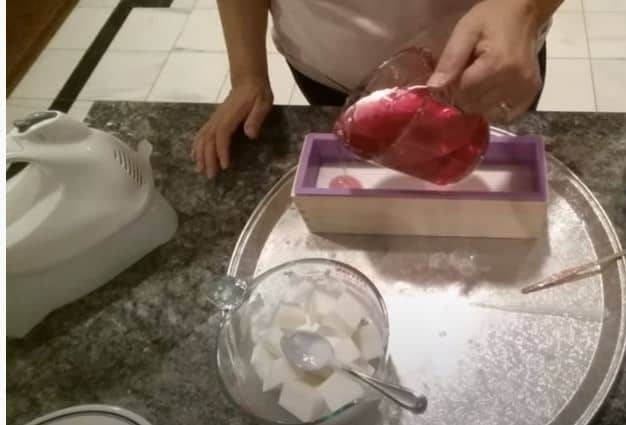
Pour the opaque soap based first into the mold and let it develop a thick skin. You want the glycerin to stay thick but also fluid. If it thickens up to the point where it gets clumpy, simply warm it up in the microwave for 10 seconds or less and check the consistency to make sure it is easily mixable but not too hot.
Once you have a thick skin on the opaque melt and pour base, you can pour the glycerin melt and pour on top of it. If you pour at a higher level it can break through the skin just a little bit easier so that it can create a nice design.
Once you have poured your basis into the mold spray with a small amount of alcohol to break any bubbles that may occur.
While we’re waiting for it to set we will go ahead and start working on the top for this soap.
Take the red soap bars at you placed in the square molds earlier in grab a vegetable peeler preferably one without a guard on it and start making your embeds by shaving and making curls. Continue to make them until you have the desired amount of embeds for this soap depending on the mold size. If they do not turn out curly enough, you can go ahead and manually curl them by hand.
once the soap in the mold has hardened enough for you to put something on top of it without the soap popping through. You can now start working on the frothy topping.
Depending on the size of your mold, you may want to use more or less opaque soap base. It is ok if you use too much as it can be remelted and used as a topping in the future it will be too airy to use as a main soap. You would need to reheat the soap and rewhip to reuse it.
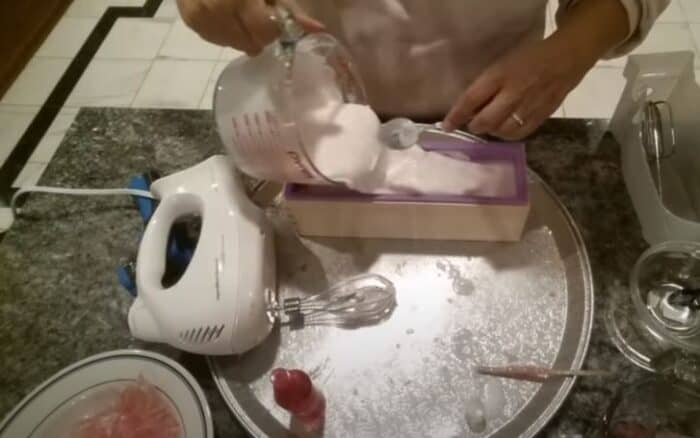
Place the opaque soap into the microwave and heat it up in 10 second intervals until liquid. You will want to grab a hand mixer with a whisk attachment. Start to whisk the soap until it begins to thicken up and develop a trace. While you are mixing with the whisker you can add a little fragrance oil at this time.
Once your soap frosting is that the desired trace you will need to move quickly and spray the top of your loaf with alcohol and place the soap frosting on top of the soap in the mold.
Once you have the frothy topping in place you will need to move quickly to get your vegetable peeled embeds on top as quickly as possible you will need to work fast here.
Once these embeds are in place go ahead and melt a small amount of melt and pour soap and drizzle lightly on top of the embeds in the frothy topping, this will allow the layers to stick together.
Once the soap is set, you can remove it from the mold and cut as desired.
Enjoy making your peppermint melt and pour soap.

Hello, ive been watching all your videos, with you and your daughter. Thank you both so much for these, i lost my 2yr old granddaughter suddenly, and you both have helped me with my grief, and inspired me to try and set up a little soap business in her memory, where i can donate to our local childrens hospital. I have browsed the website ots great!! I was eondering if you will be doing anymore vodeos, and also some information about equiptment etc. Thank you so much christina. Uk
Christina, I am so sorry for your loss. I just printed this out and gave it to my daughter. I would call your local hospital and ask them about donations, all have different rules. I have a homeless school for children here and can donate there. We are starting to slow a bit at the hospital so I hope to be back soon.
Anna
I’m in the beginning stages of wanting to make M&P soaps and would like to know if I can make a soap using both coconut oil (for a more hard bar) and olive oil (for moisturizing) w/Shea or some other soap. Also, I’d like to subscribe to your newsletter, but can’t find a subscribe button. I’m excited to check out your website from top to bottom! ?
I would visit Wholesale Supplies Plus for bases with those ingredients. I am not sure where my newsletter button has gone. Thanks for letting me know.
Anna
I’m actually really new at making soaps. I stayed 6 months ago from my mother sending me a diy kit and I made the entire kit in one day. I came across your YouTube channel and I made a peppermint soap similar that I wanted to share with you. (I’m not good at piping either) 🥰